Fly 1:48
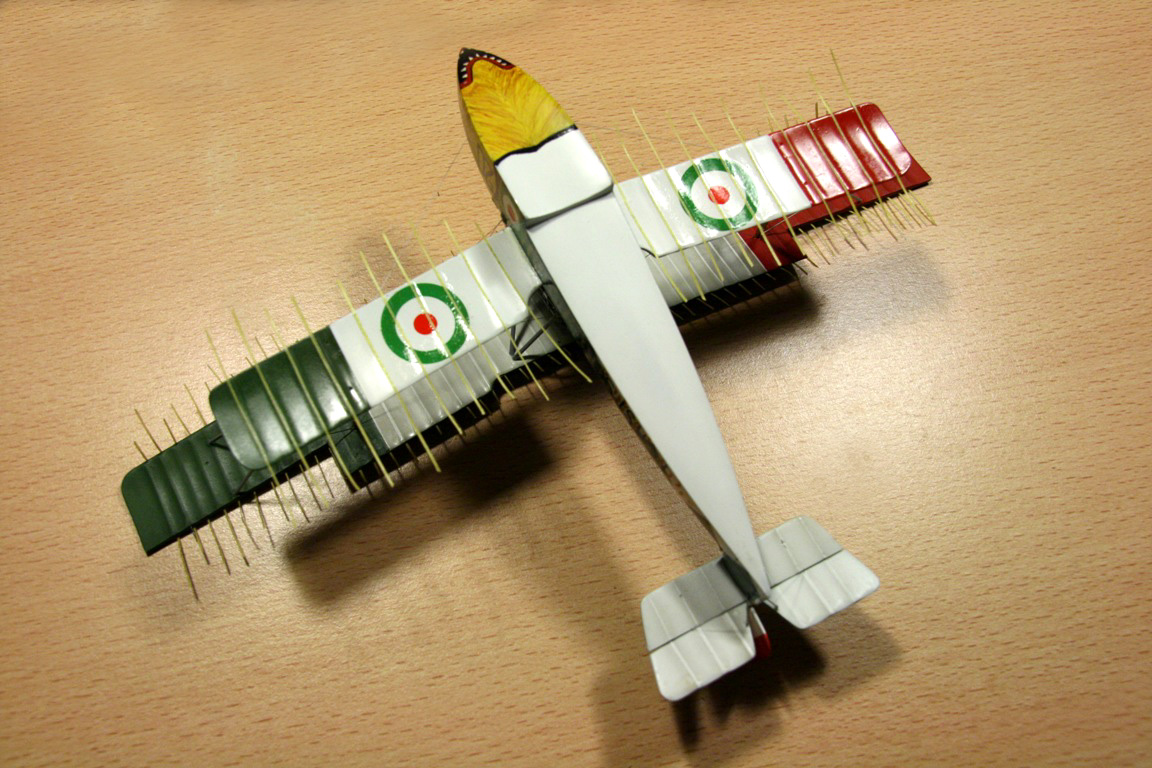
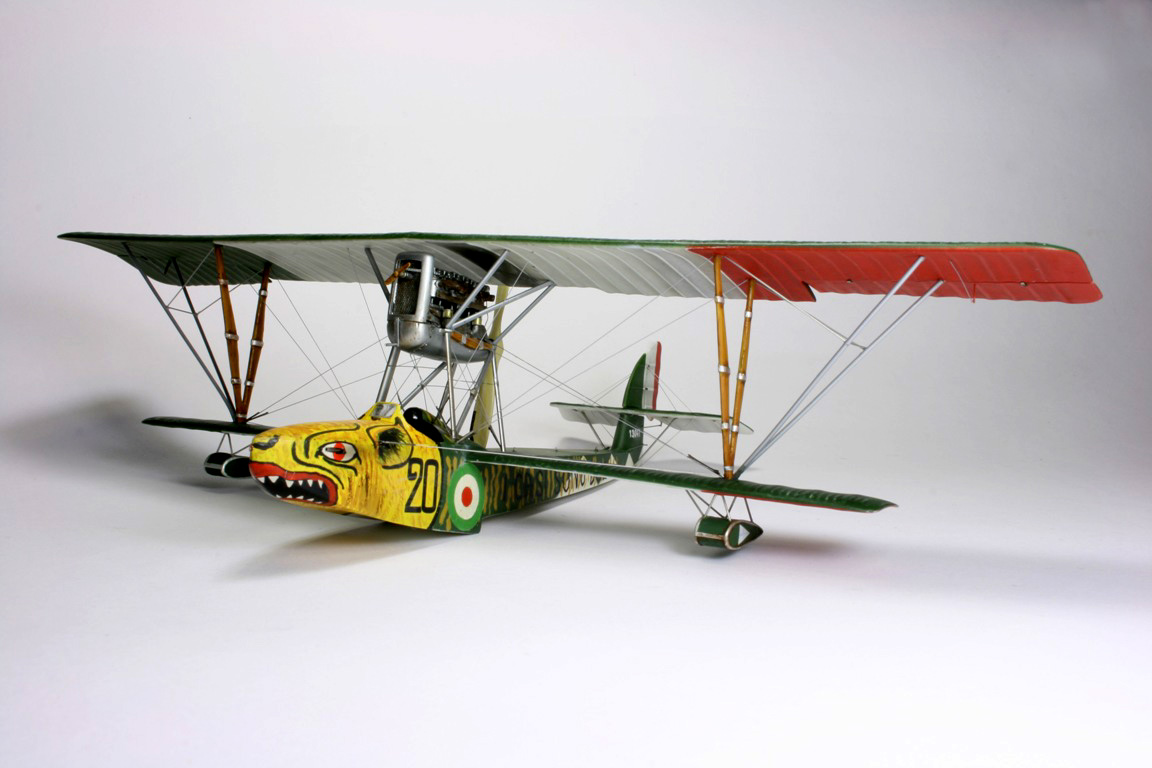
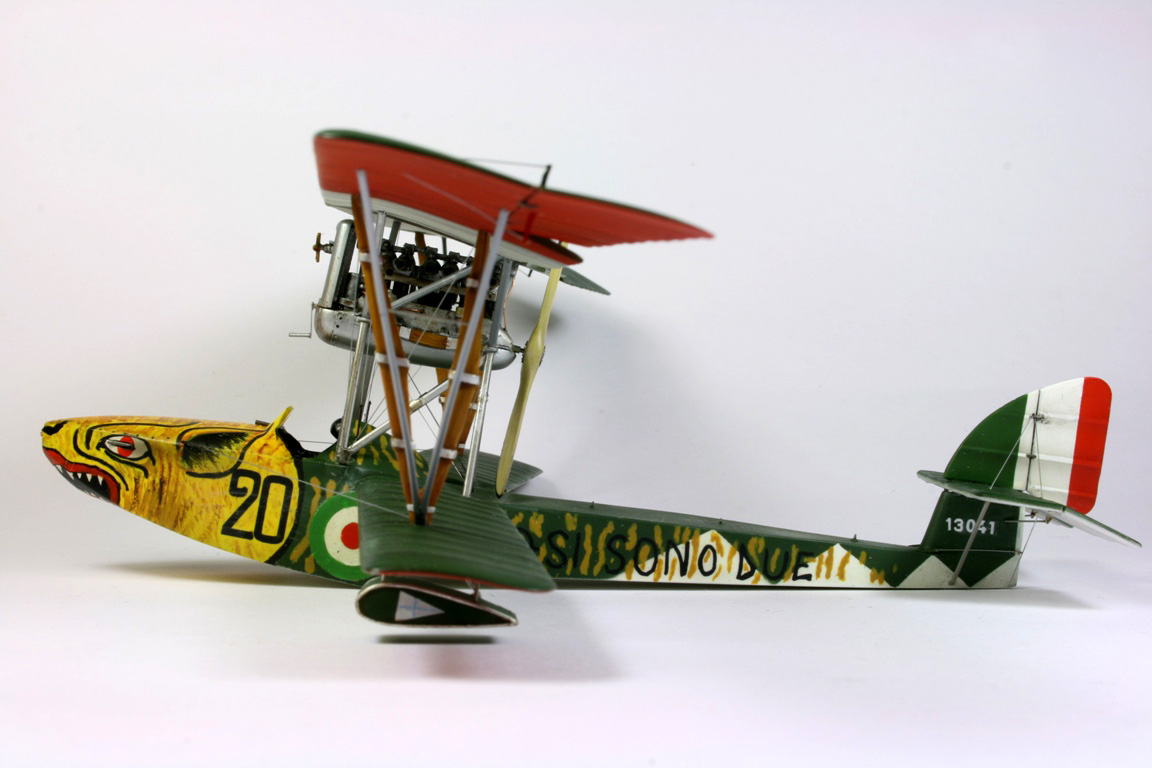
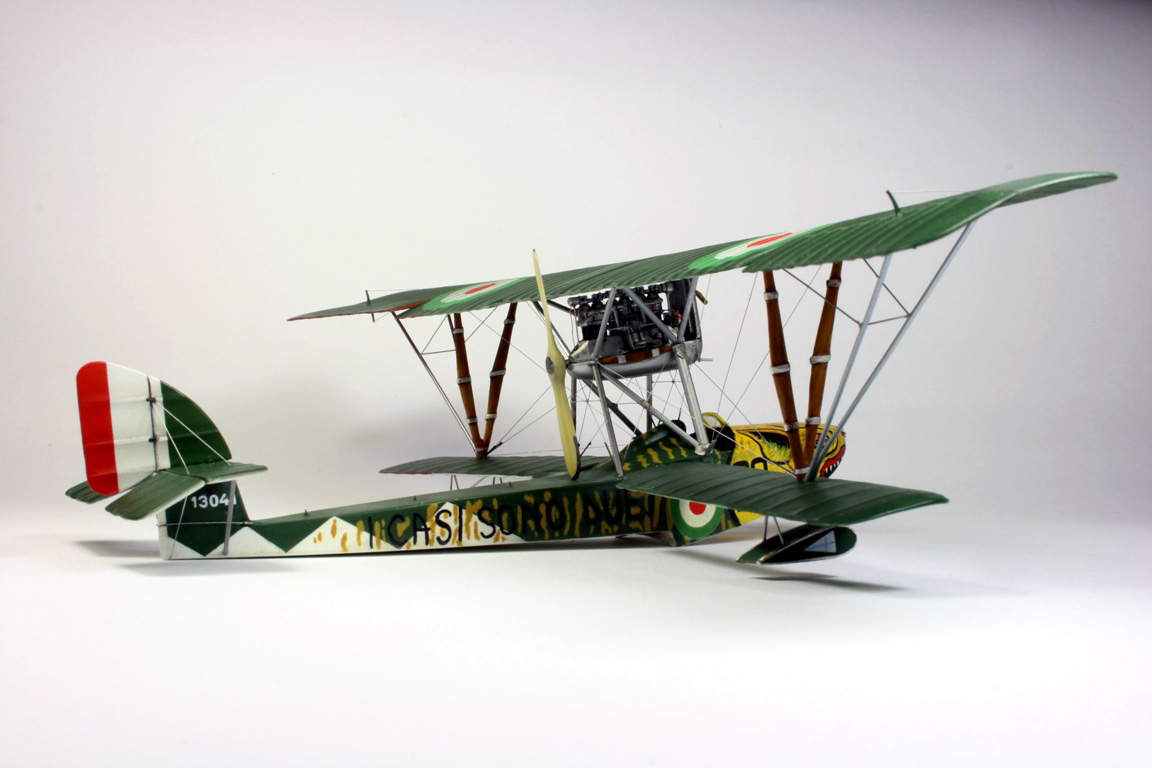
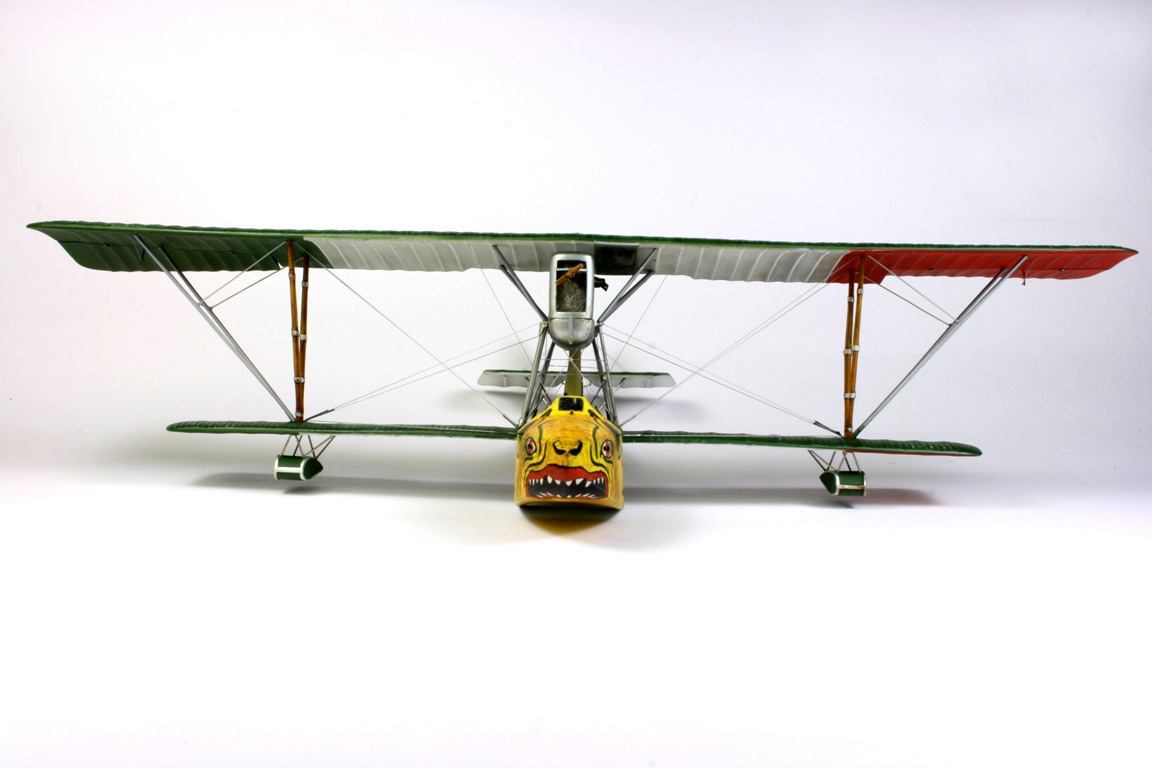
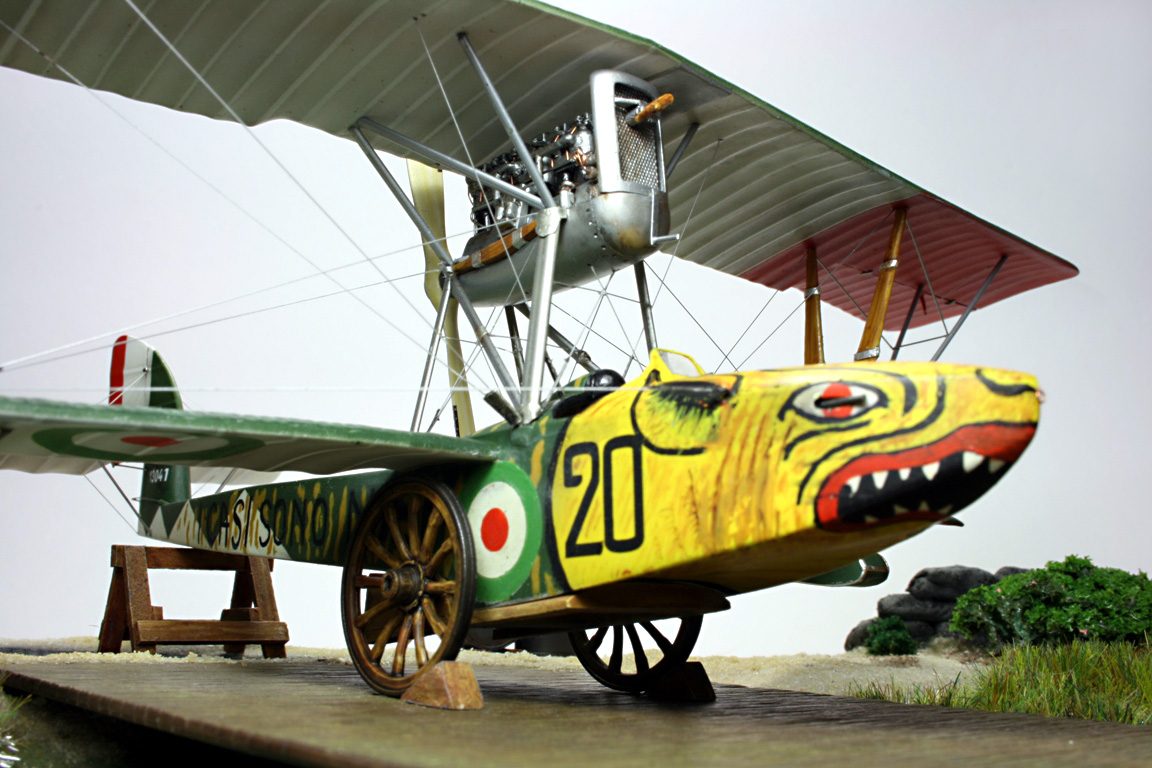
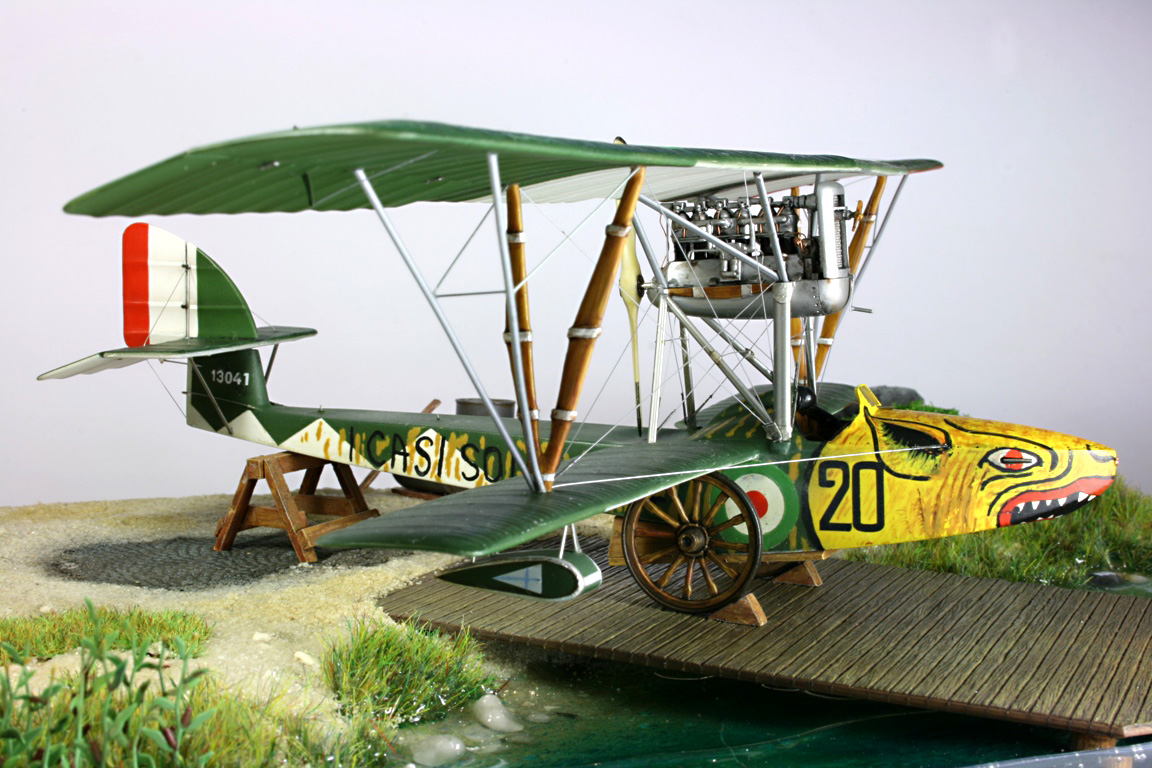
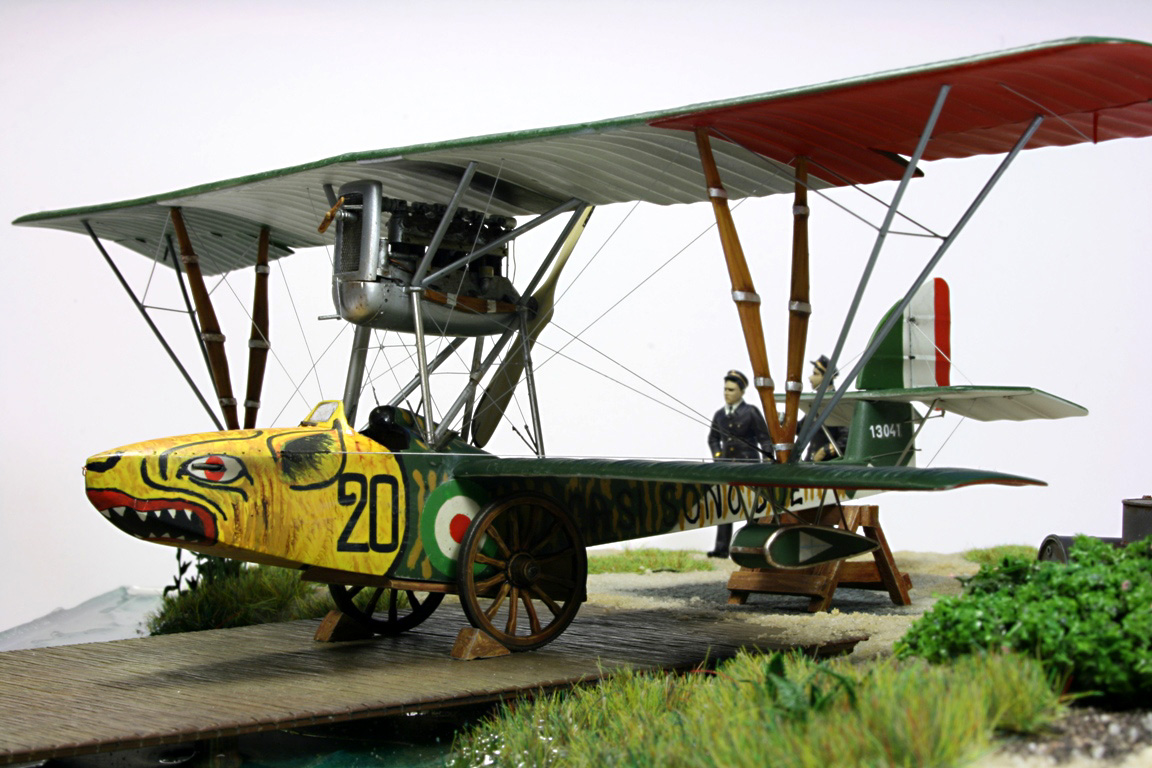
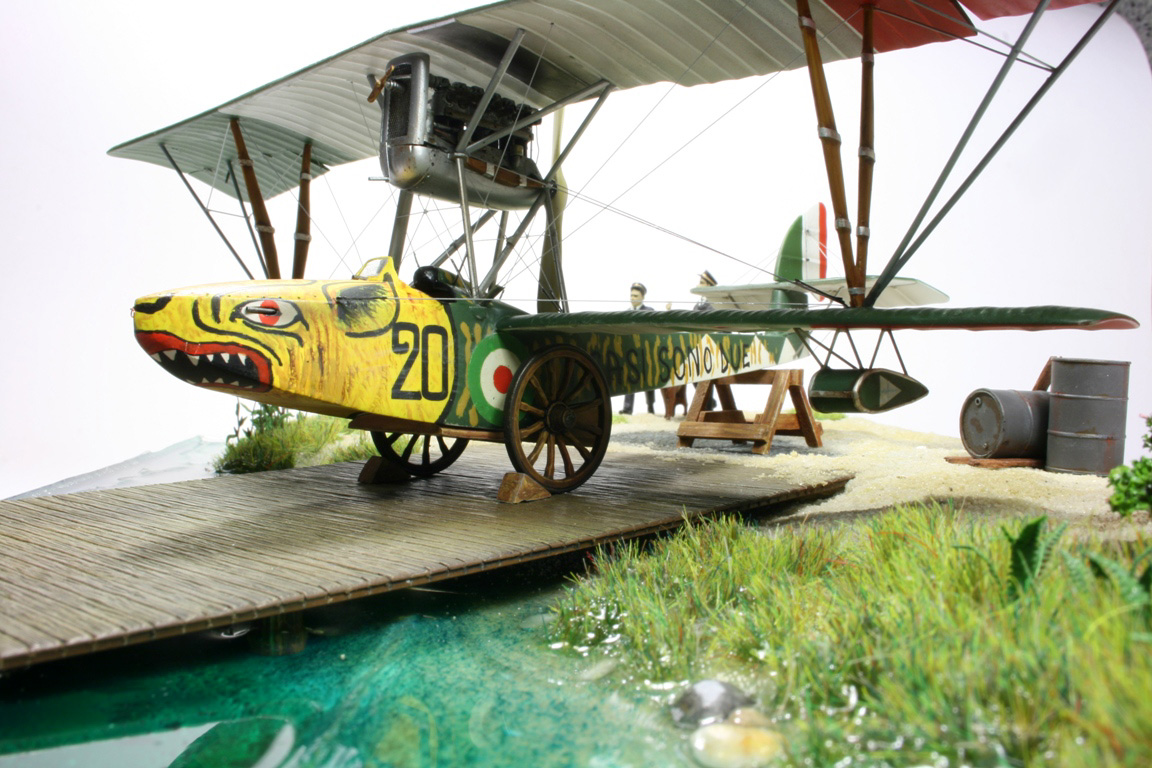
IntroductionSometime in 2008, on the Euro Scale Modelling of IPMS Holland in Utrecht I got seduced by the “Devil’s Advocate” in person of my friend Aleks to buy this – for me so far unknown – kit. As it proved later, it’s sometimes better to resist the temptation…HistoricalThe Macchi M5 was designed early 1917 as a single seater figter-flying boat, being a continued development of the Macchi Lohner L.3 model. The machine was introduced to the front units already in the fall of 1917 where they proved to be quite successful, as due to their speed they could even keep up with German or Austrian land-based fighter planes.The aircraft was ared with one, later two 7,7mm Vickers machine guns, and features the 160 HP (118 kW) Isotta-Fraschini- V.4B in-line engine. The Varese-based manufacturer produced overall about 350 , some more units were built at the IAM plant in Napoli. The type stayed in operation till 1923. The M5 earned a particular reputation for serving with the US expeditionary corps in Italy, where C Hamann received the first Congressional Medal of Honor ever granted to a Naval aviator. The built model features the aircraft with the serial number 13041, which served till July 1918 in the 261. Squadron of the Regia Marina (Royal Italian Navy) at was stationed close to Venice. It was flown by the leader oft he unit, Domenico „Pepuzzo“ Arcidiacono (military rank Sottotenente di Vascello). | 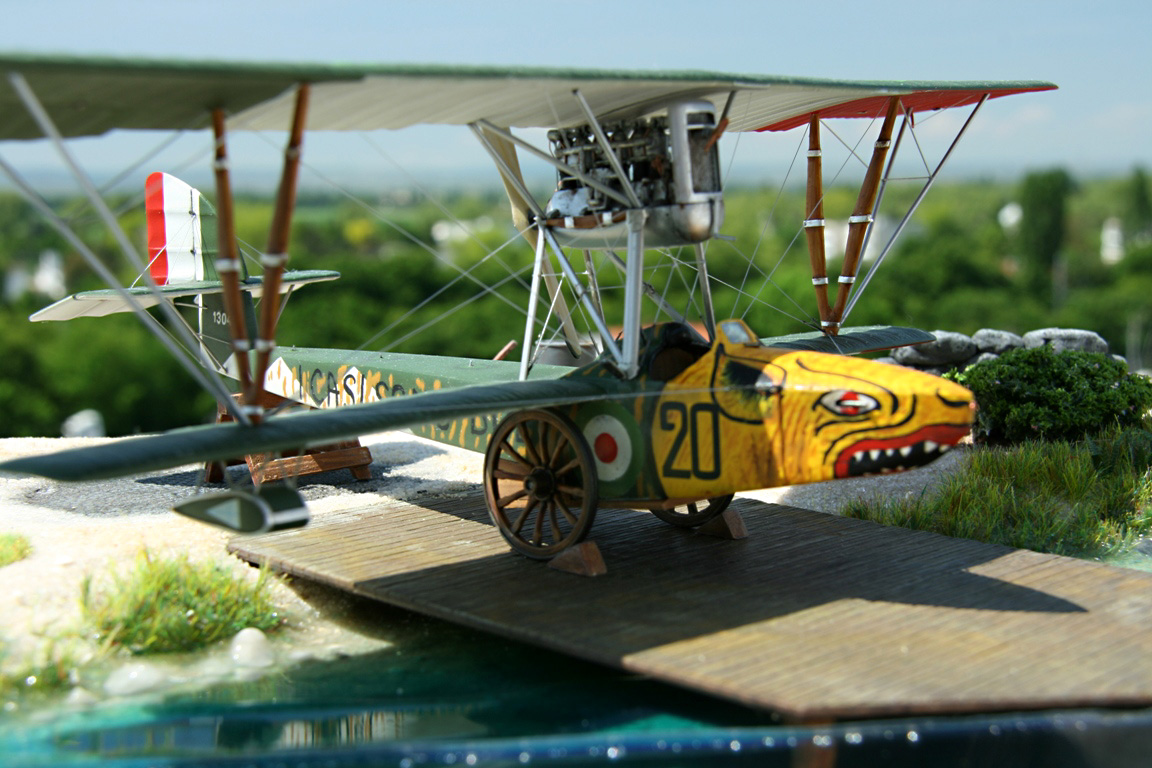 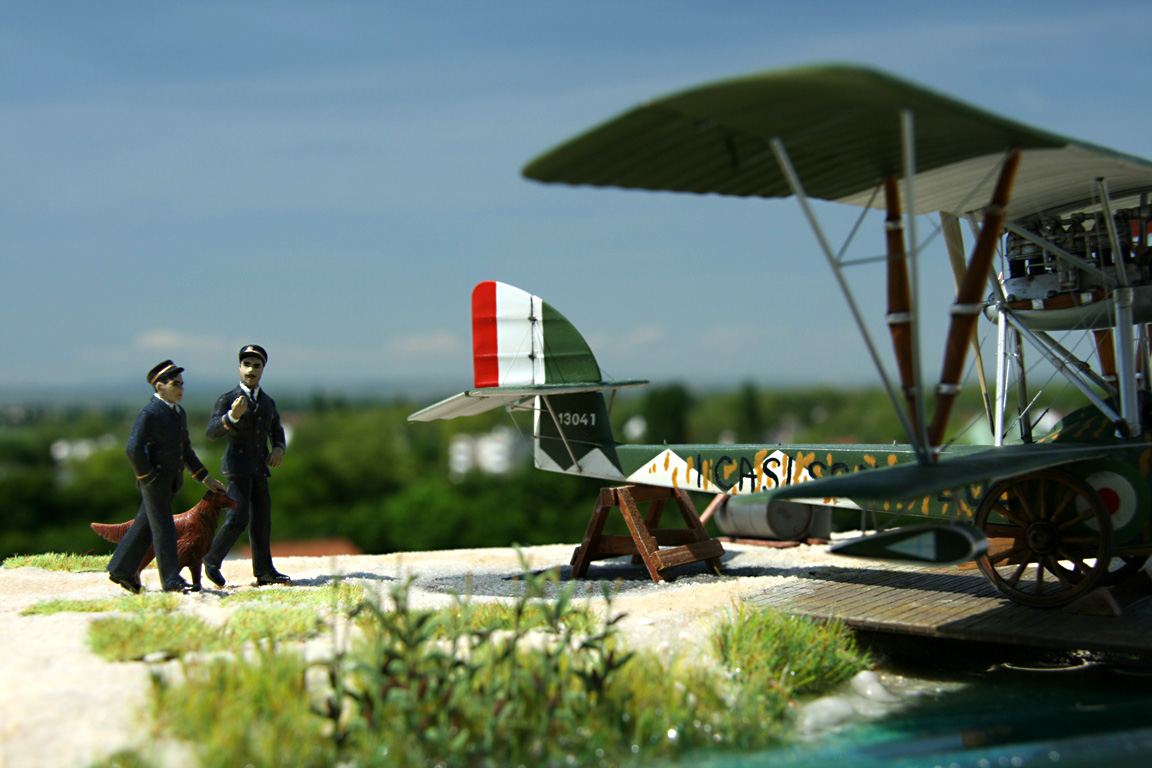 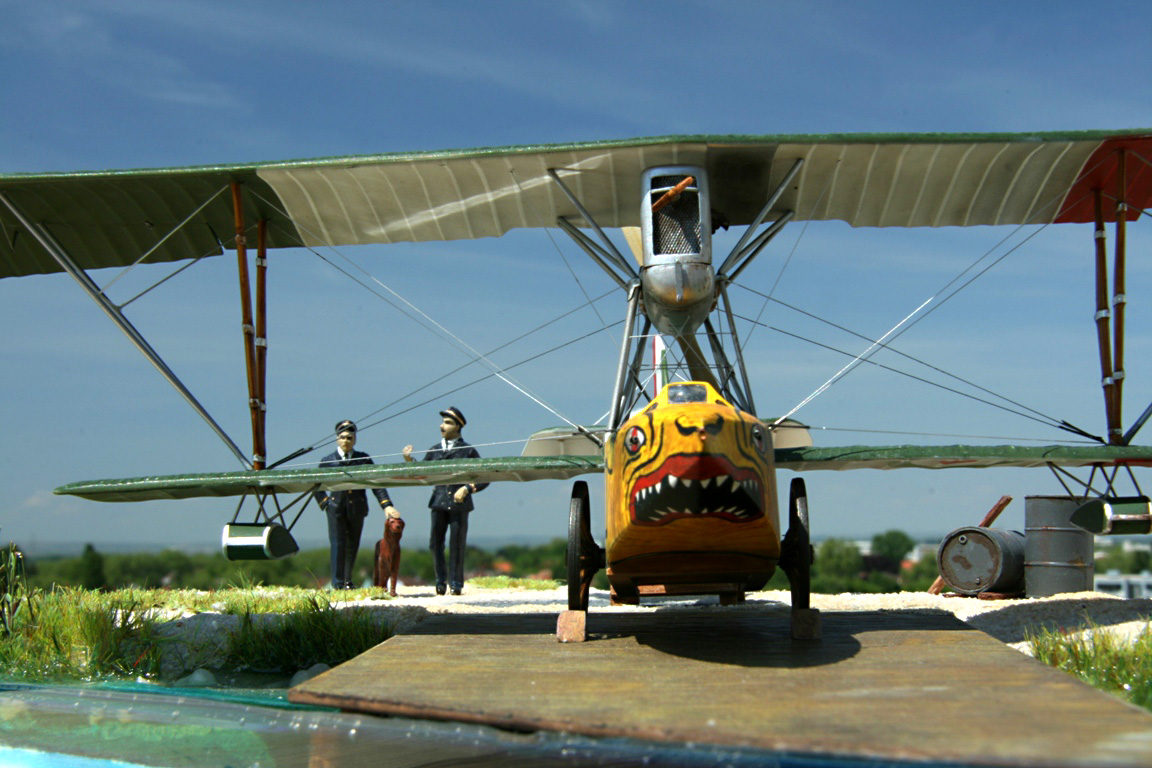 |
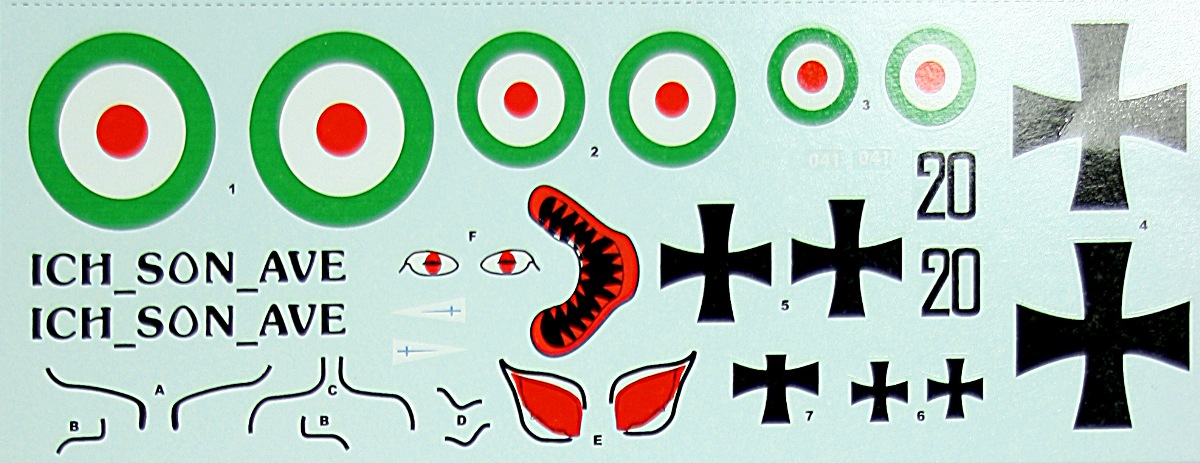
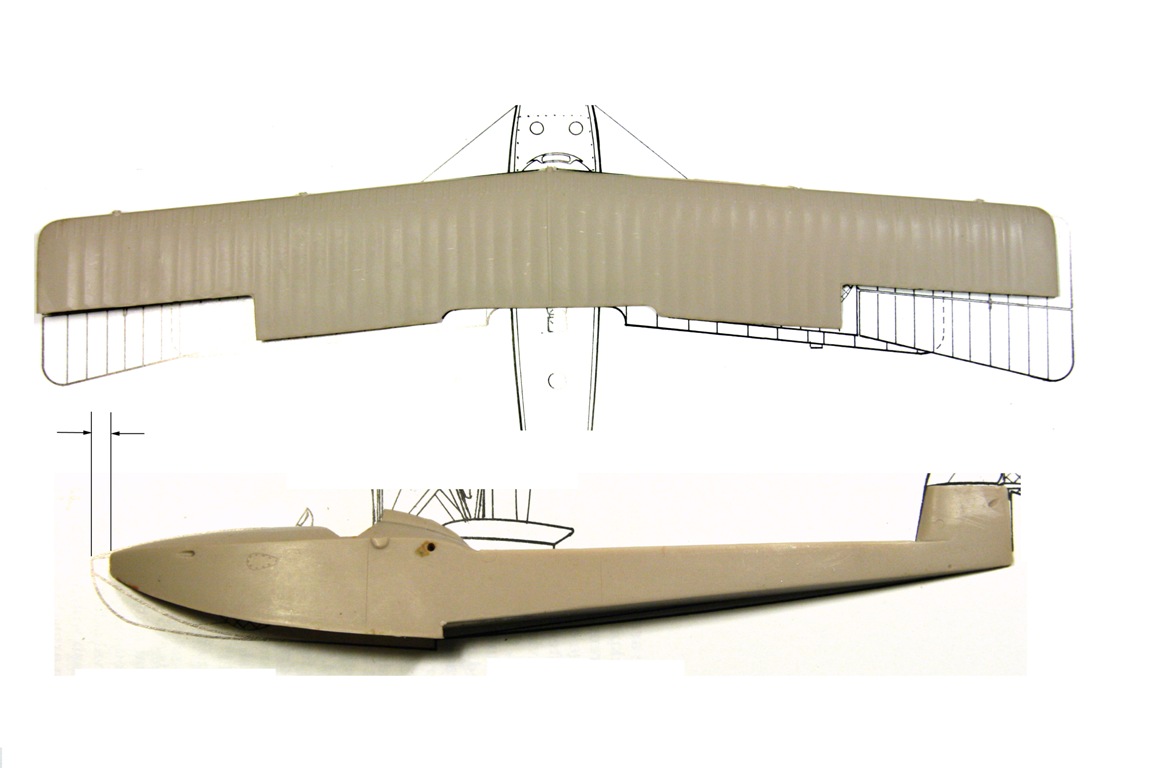
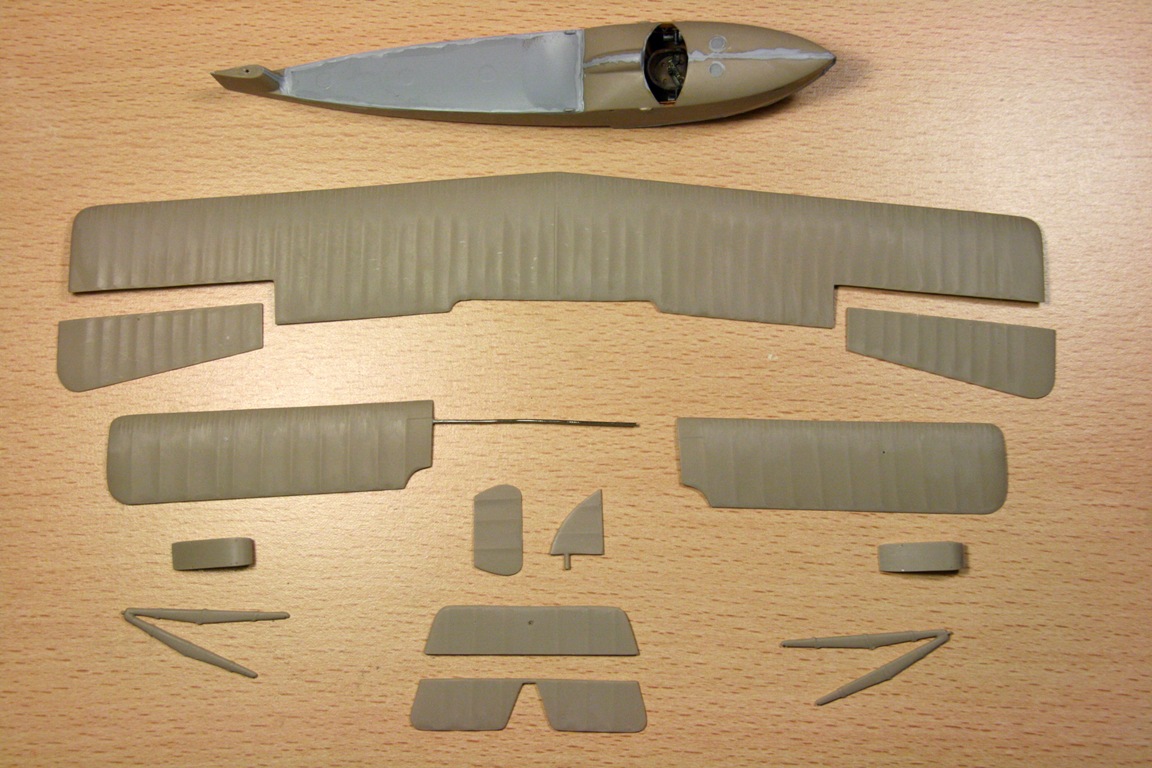
The Kit:At the first glance, the contents of this rather expensive kit (I paid 36 Euro) looks rather promising. For a short run kit acceptable surface roughness, no visible casting defects or flash. Attached was a bag or resin components. There were no PE parts, though, which is generally common with models of the type and price. Additionally, there’s a decal set, with a rather strange writing on it.The instruction is rather general, so there’s no way without the Windsock DataFile Nr.86 by Gregory Alegi. With the data file on hand, I checked the accuracy of the parts – across the board they appear to be on the small side. Assuming, the Windsock files are correct, the Fly model seems to be more in the 1:50 scale. Due to the nature of the kit, it is only recommendable to experienced and highly frustration tolerant modelers. 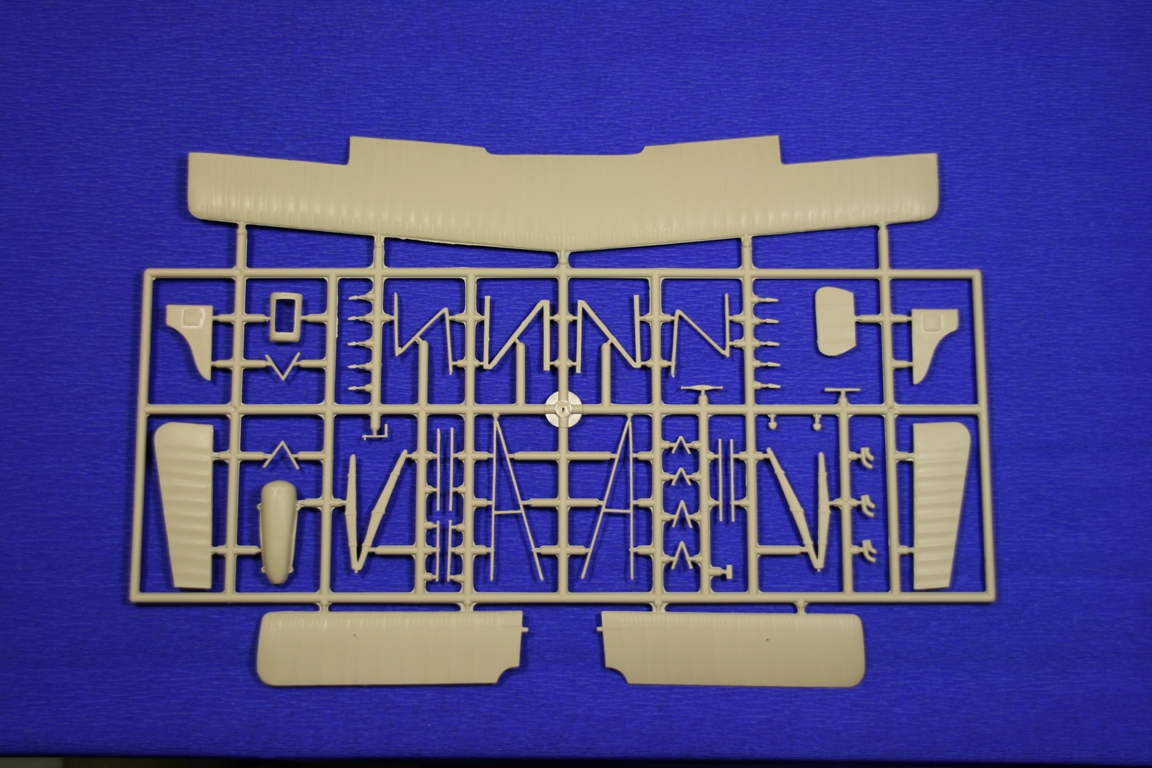
|
|
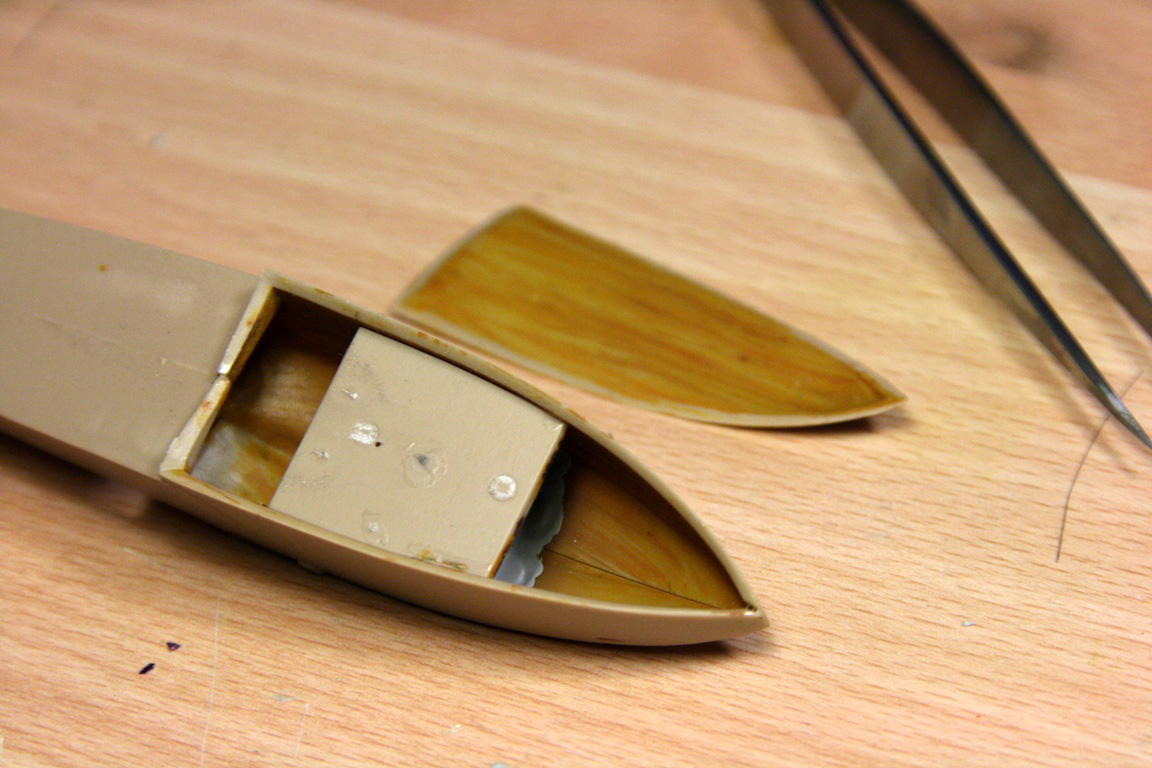
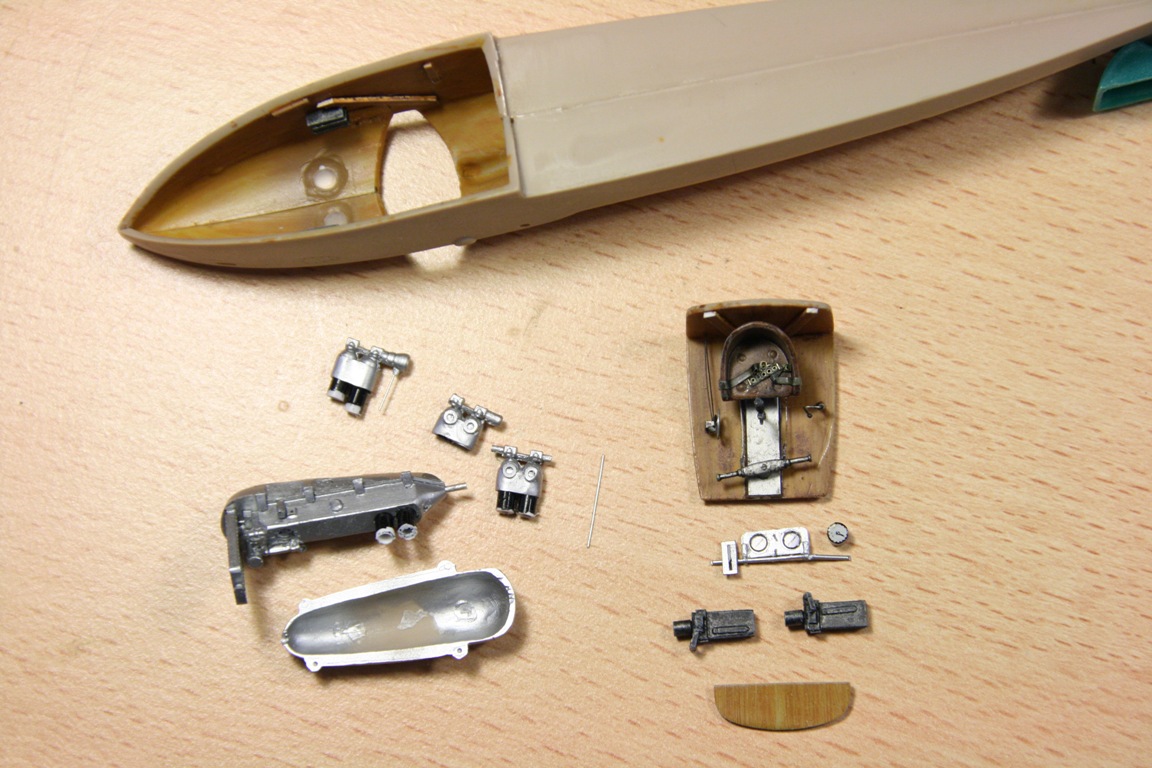
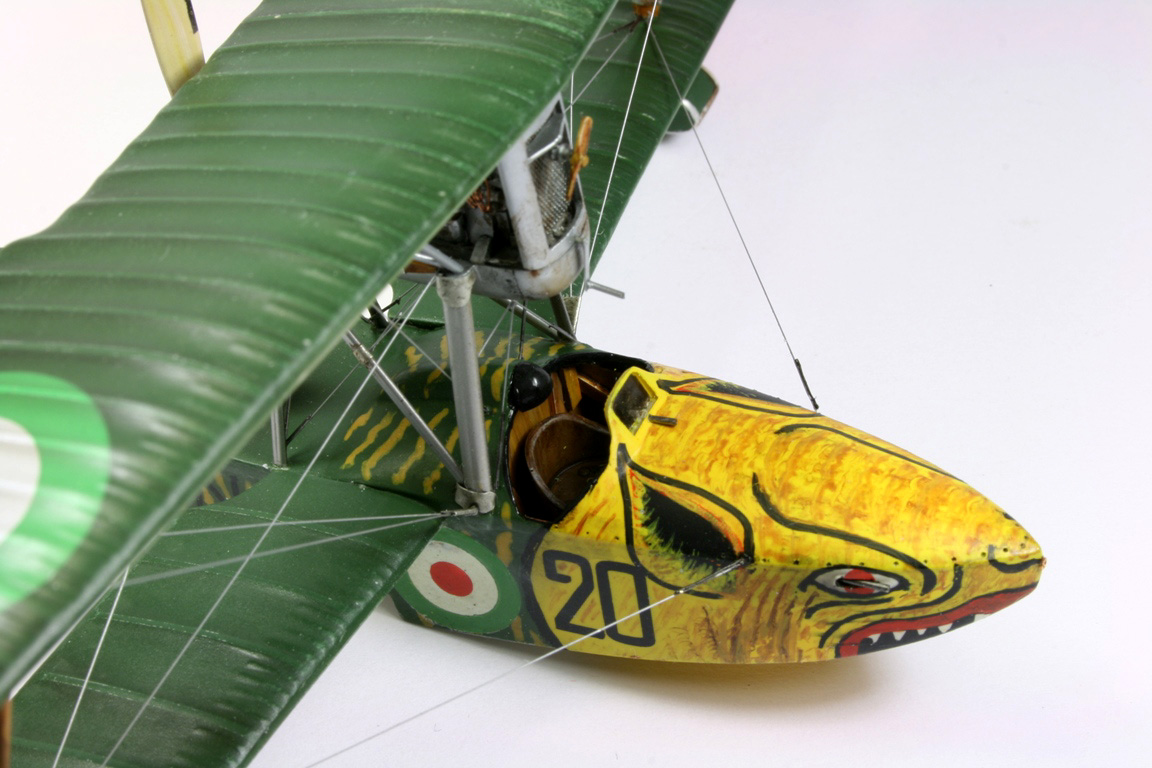
The Build:CockpitA dry fitting showed, that the attached components were hardly useful, so I decided to build them from scratch. The instrument boards were made from PE leftovers, the gages sketched on a PC and printed. The guns, stick and the control cables were made from bits and pieces from the leftover box.Neither the instruction (nor the Windsock) mention any cockpit internal painting specification whatsoever, so I stayed with the vague hint, that it was varnished natural wood. 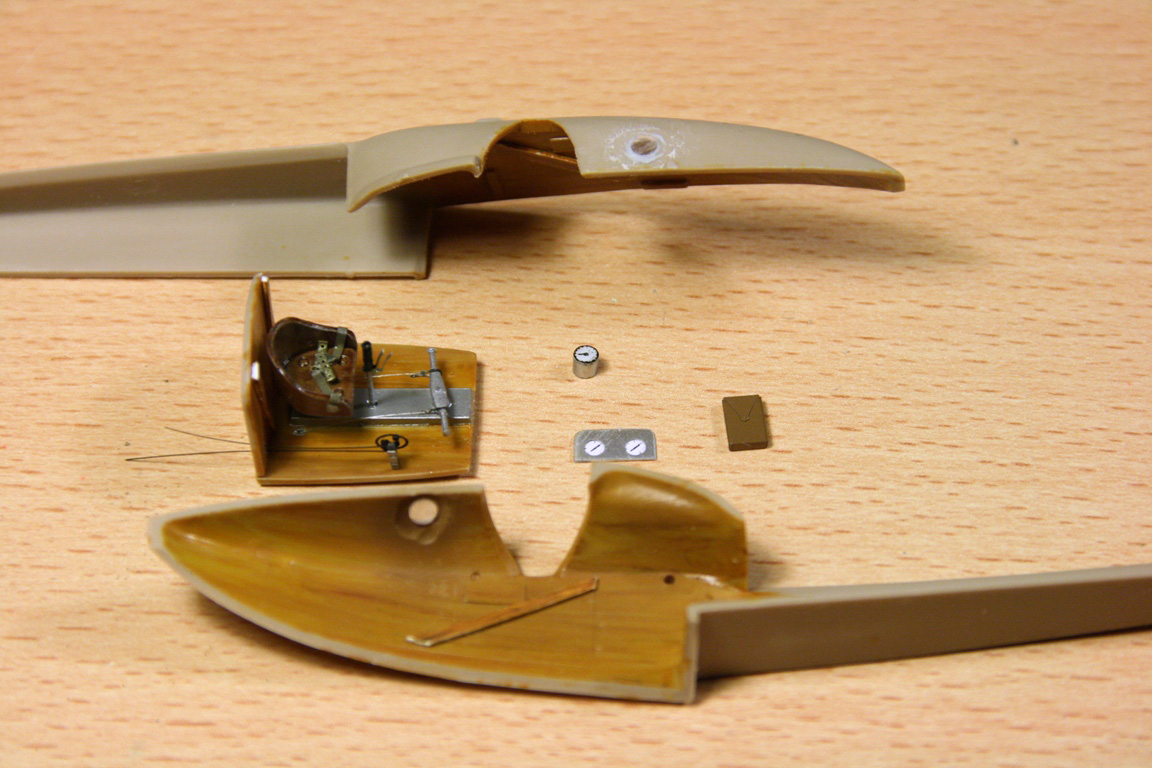
 |
   |
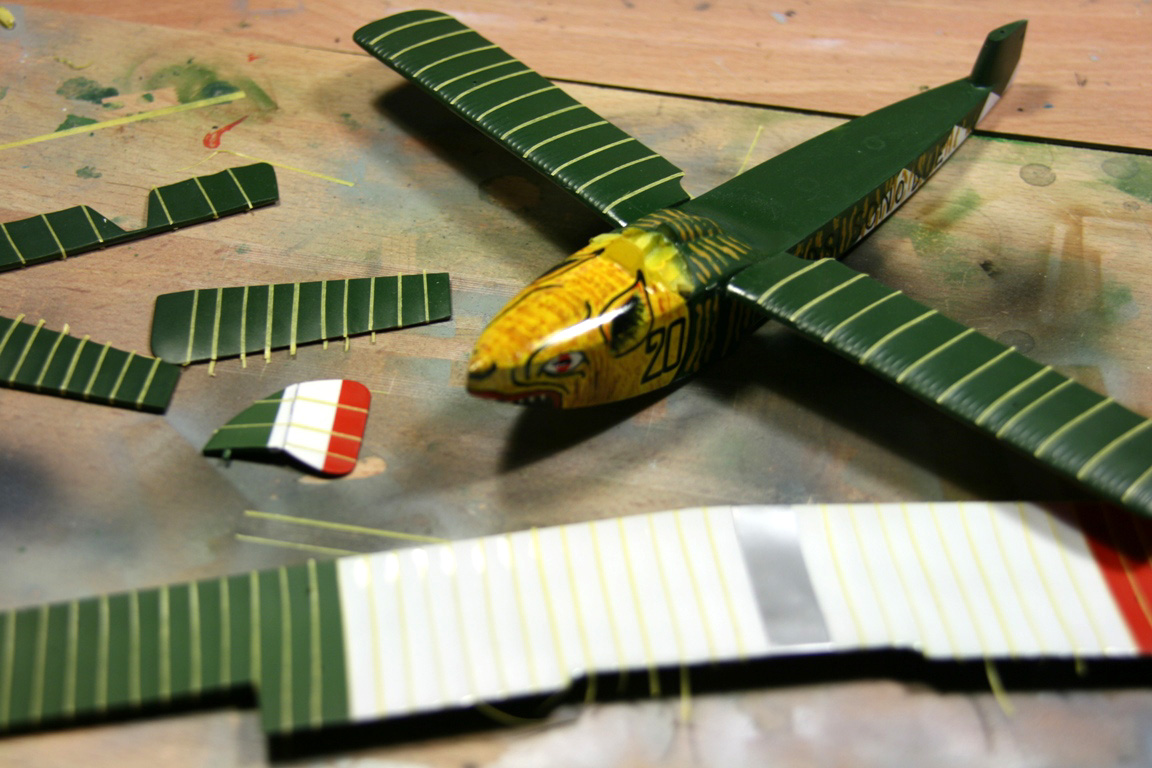
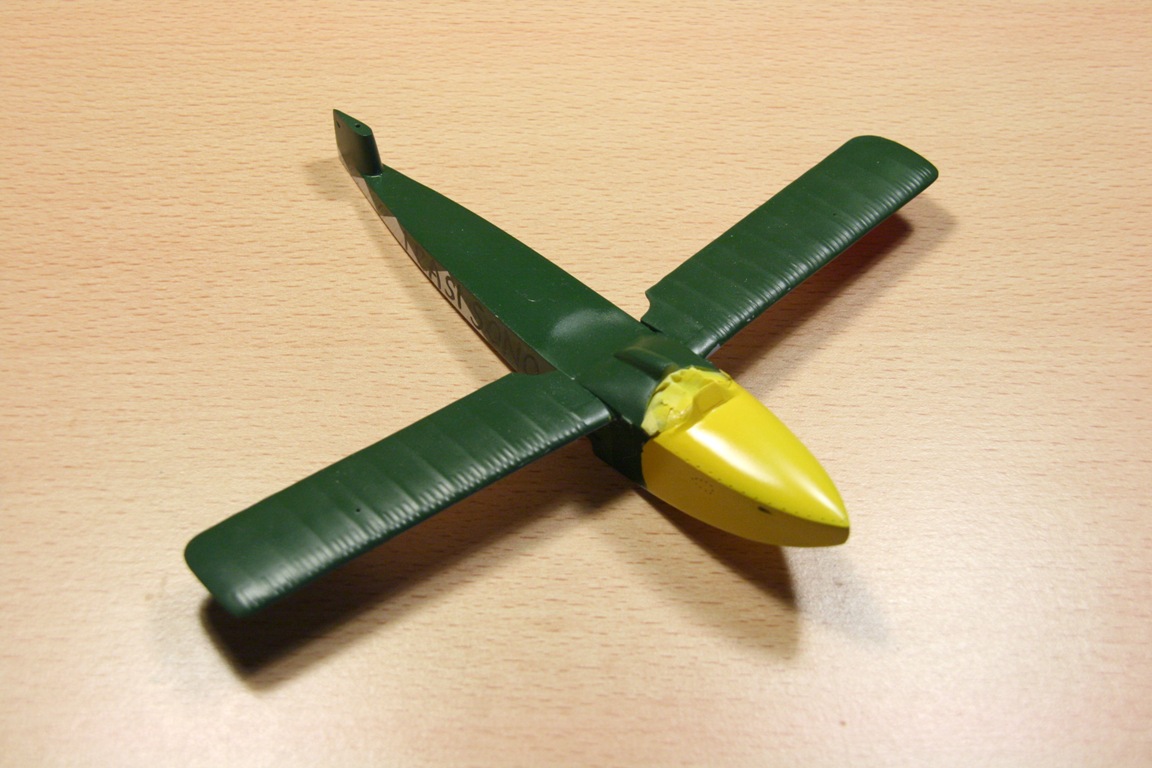
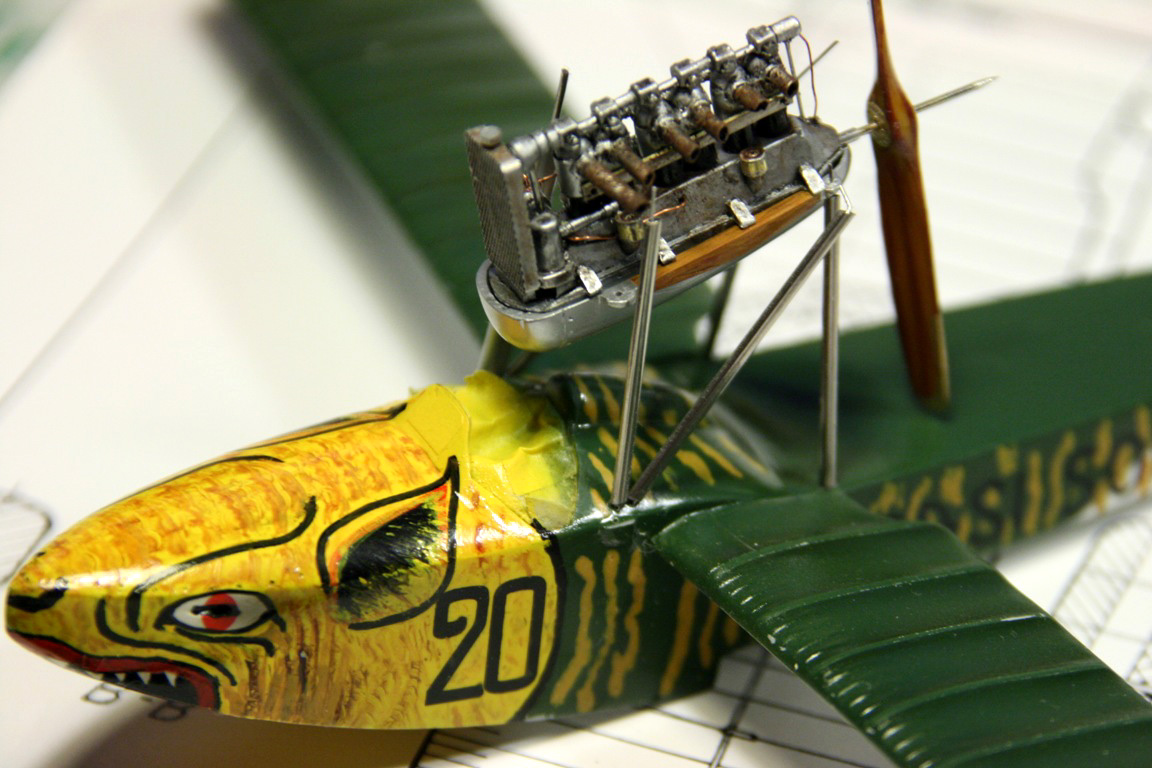
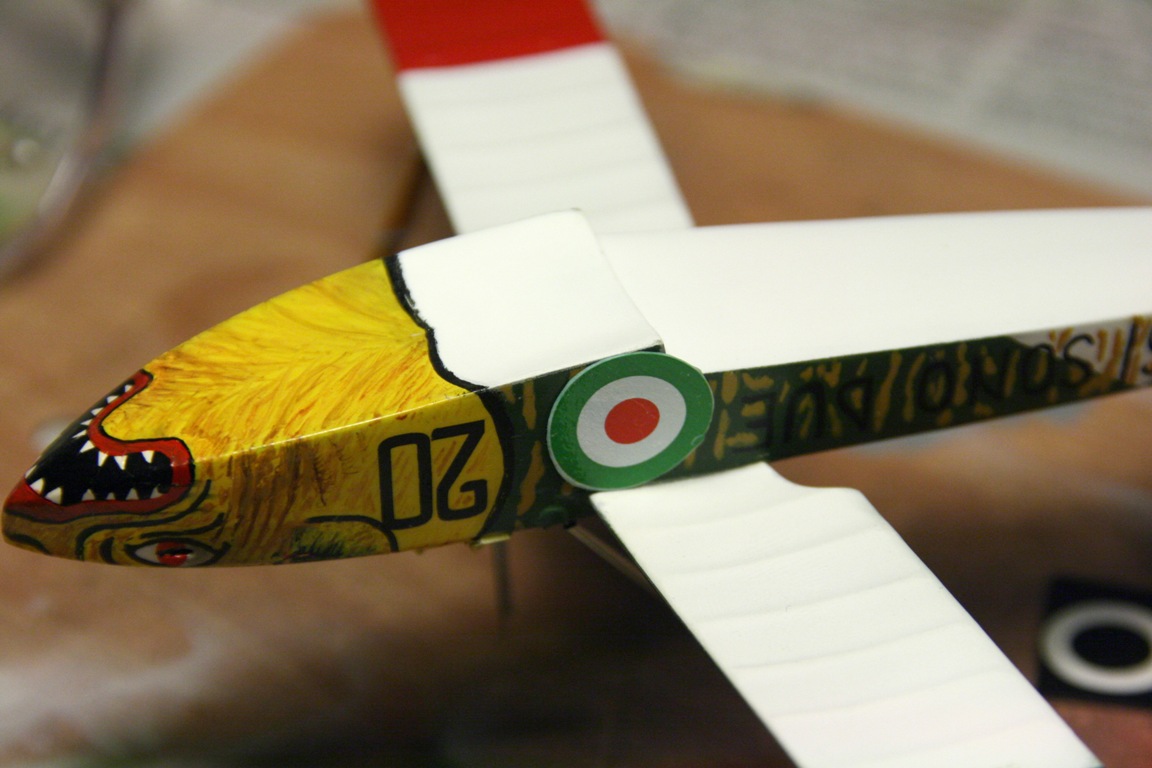
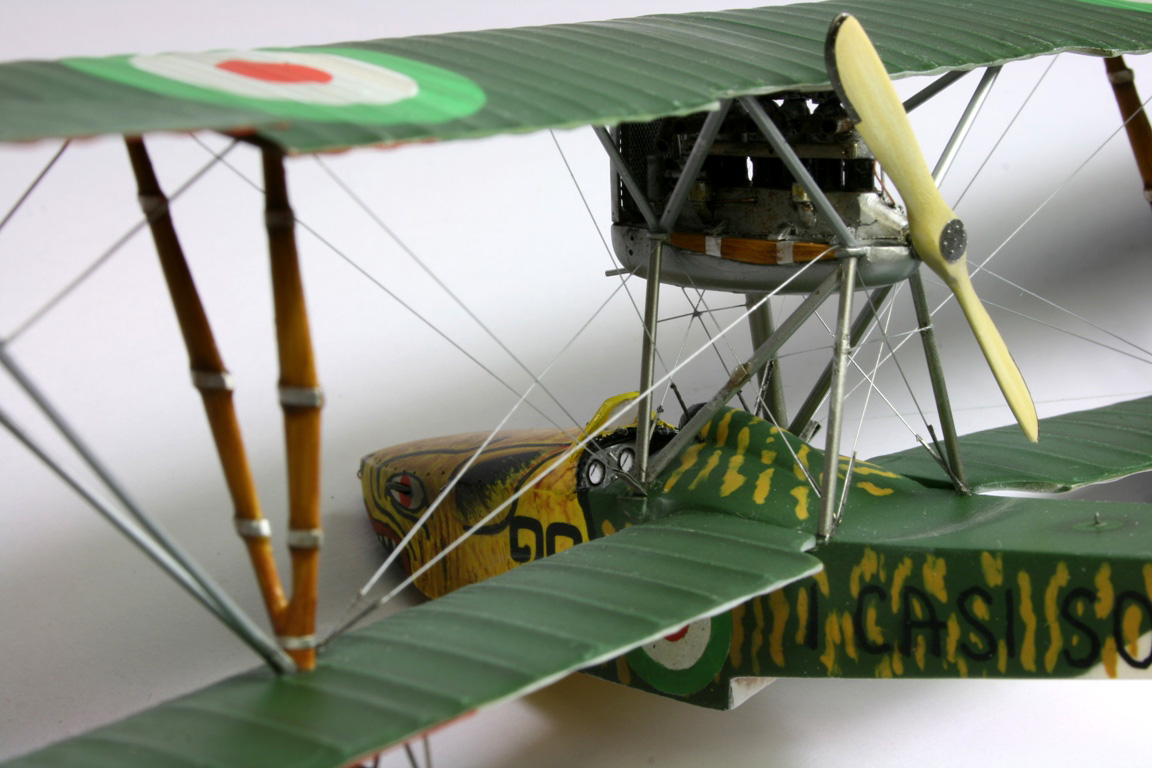
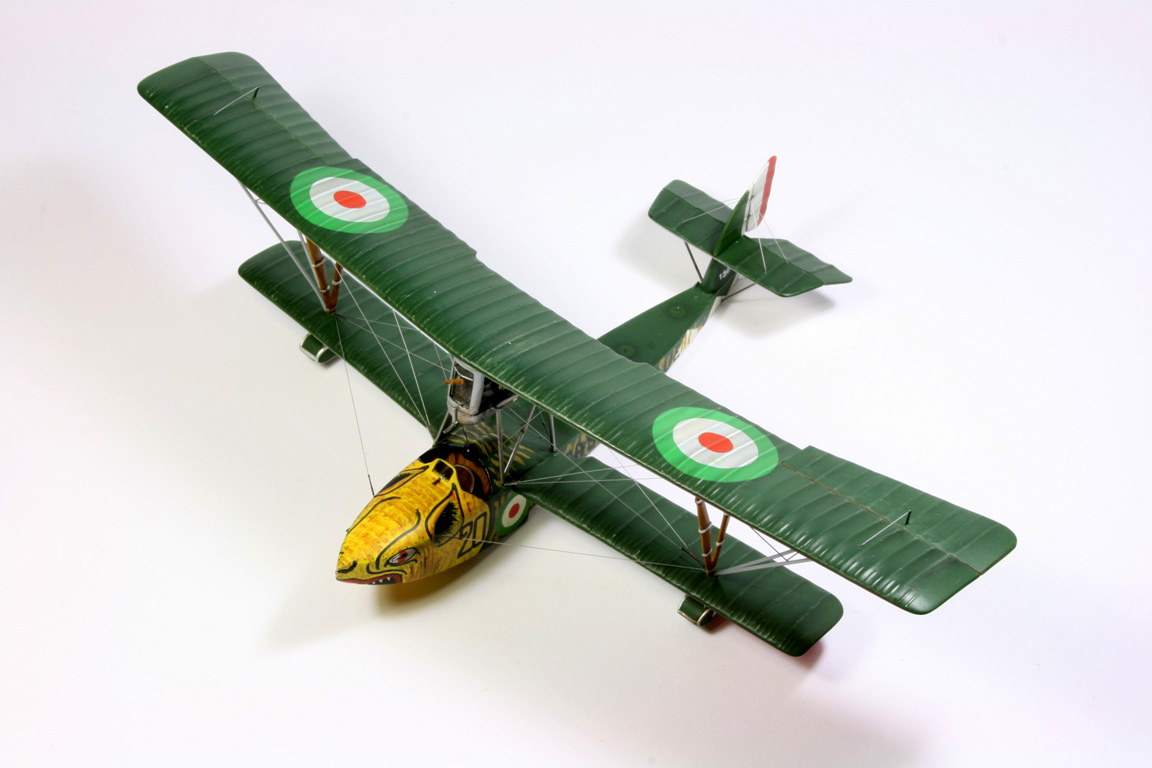
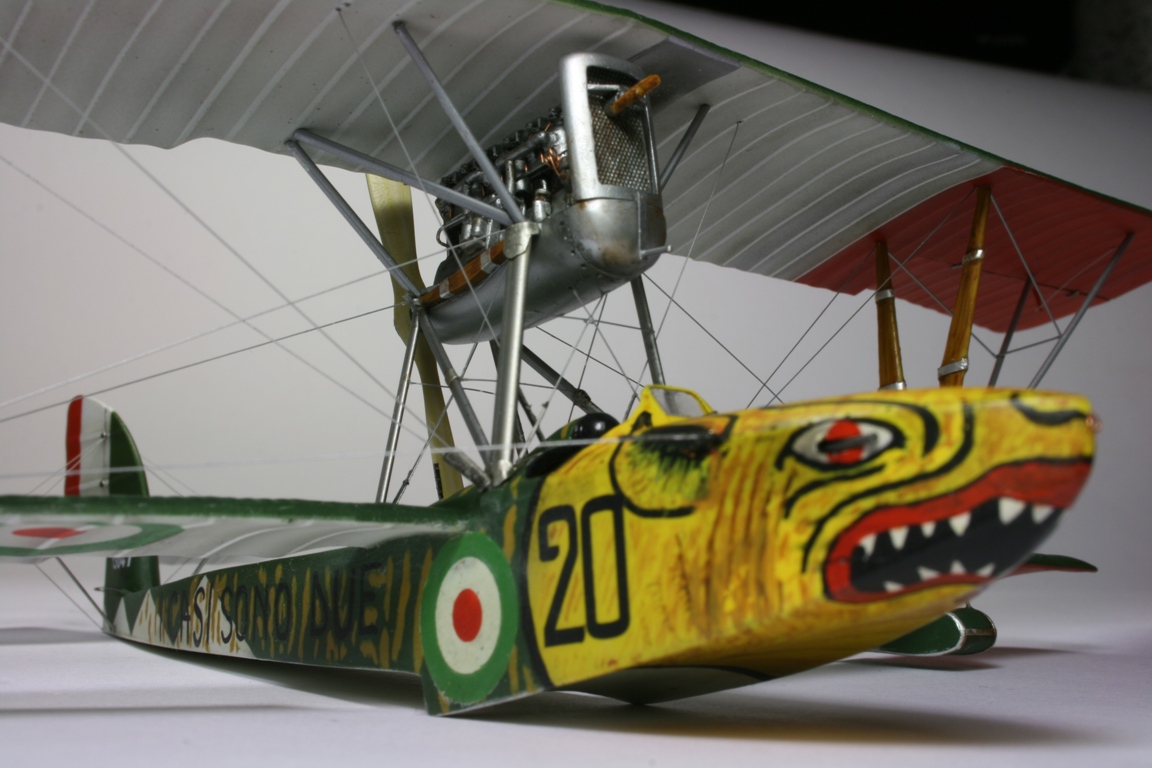
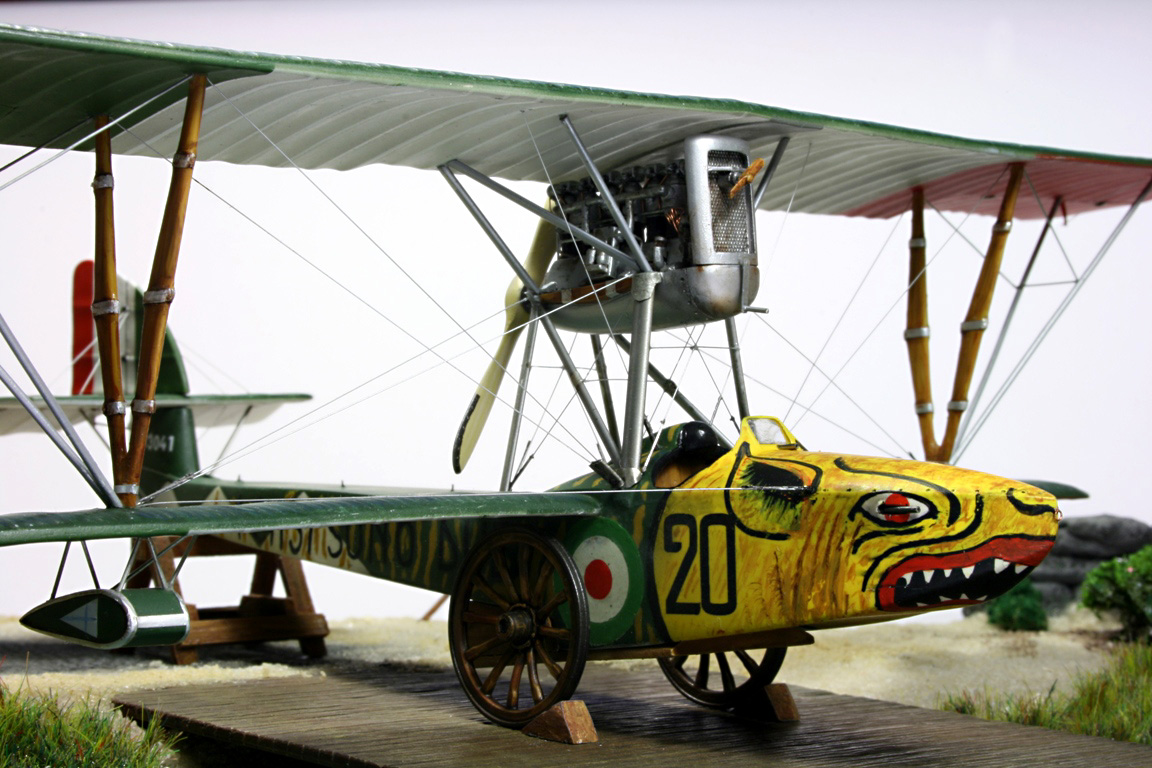
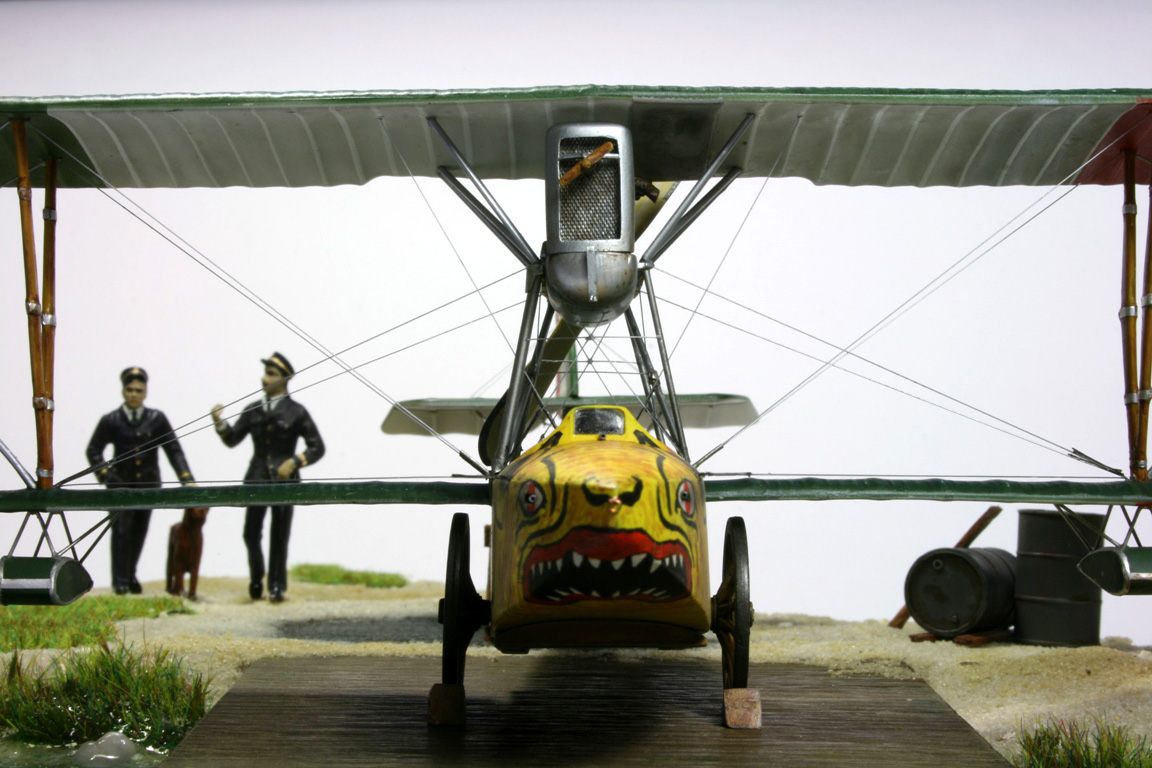
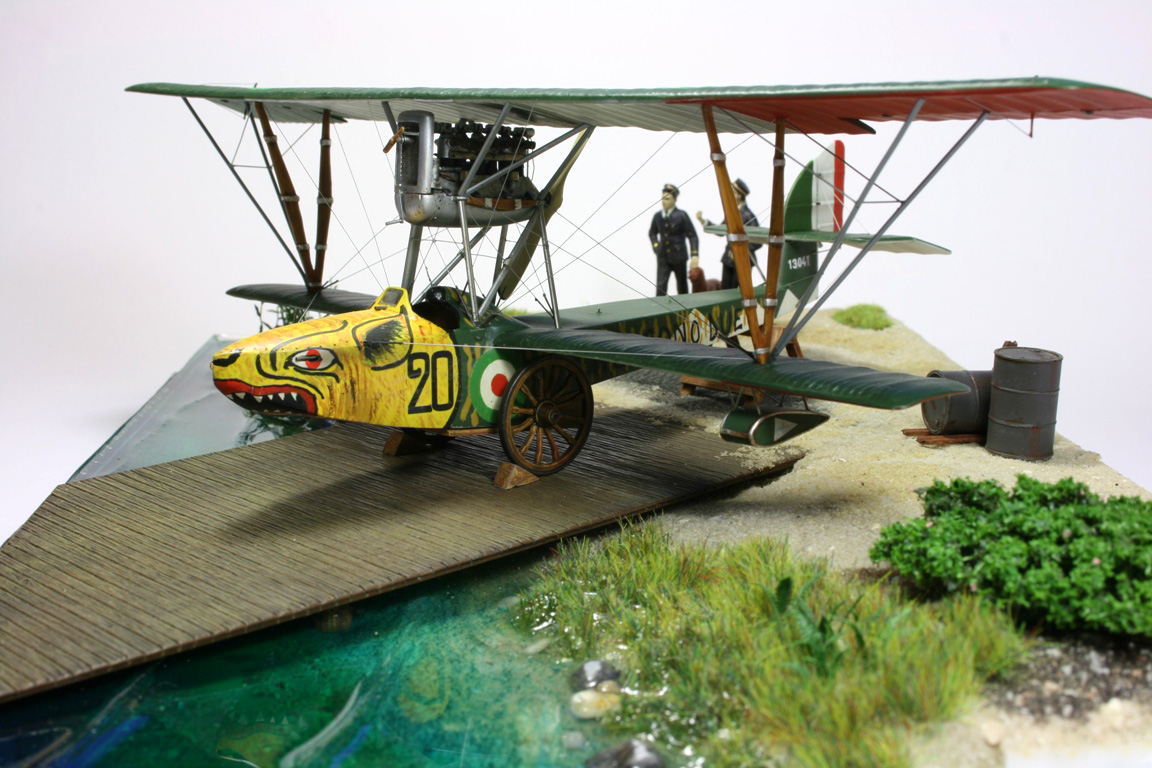
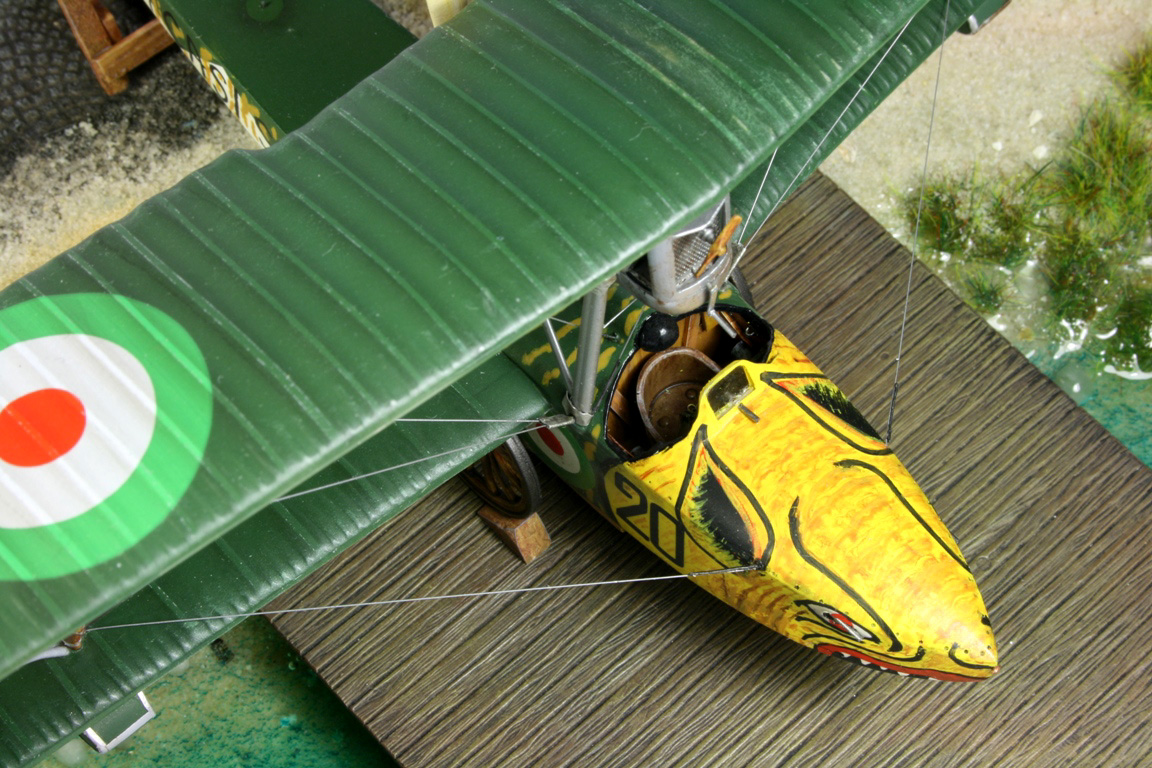
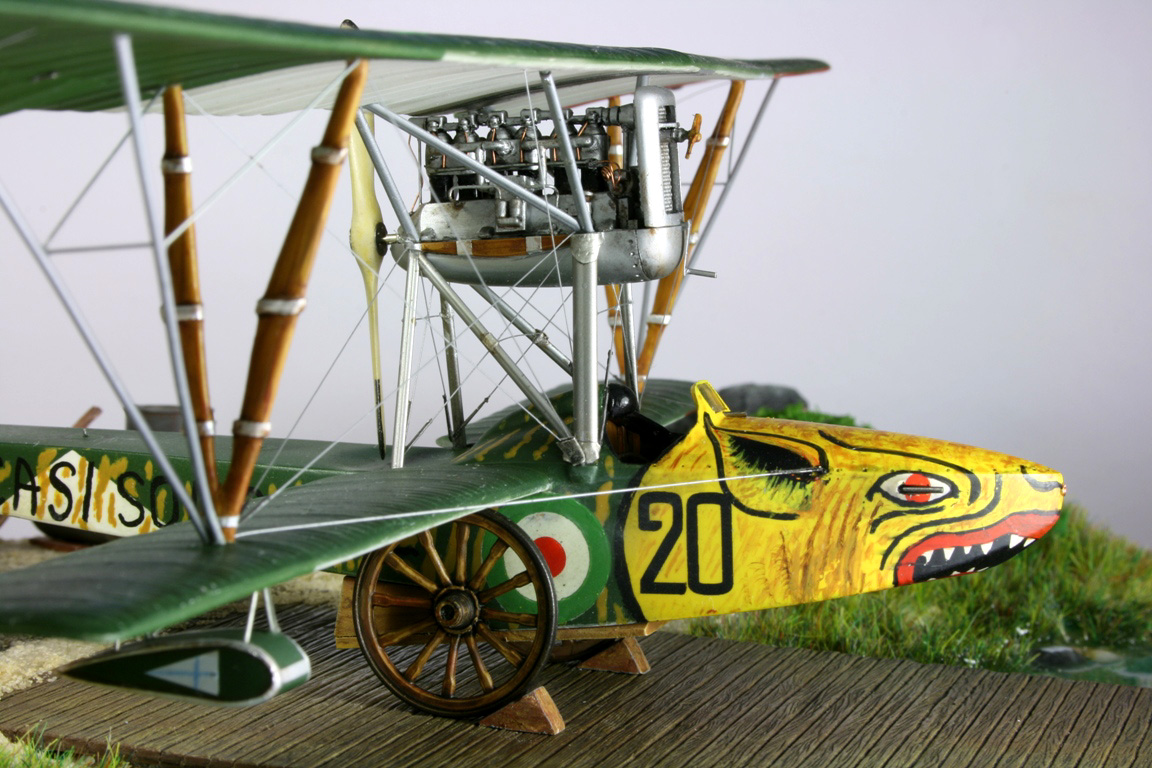
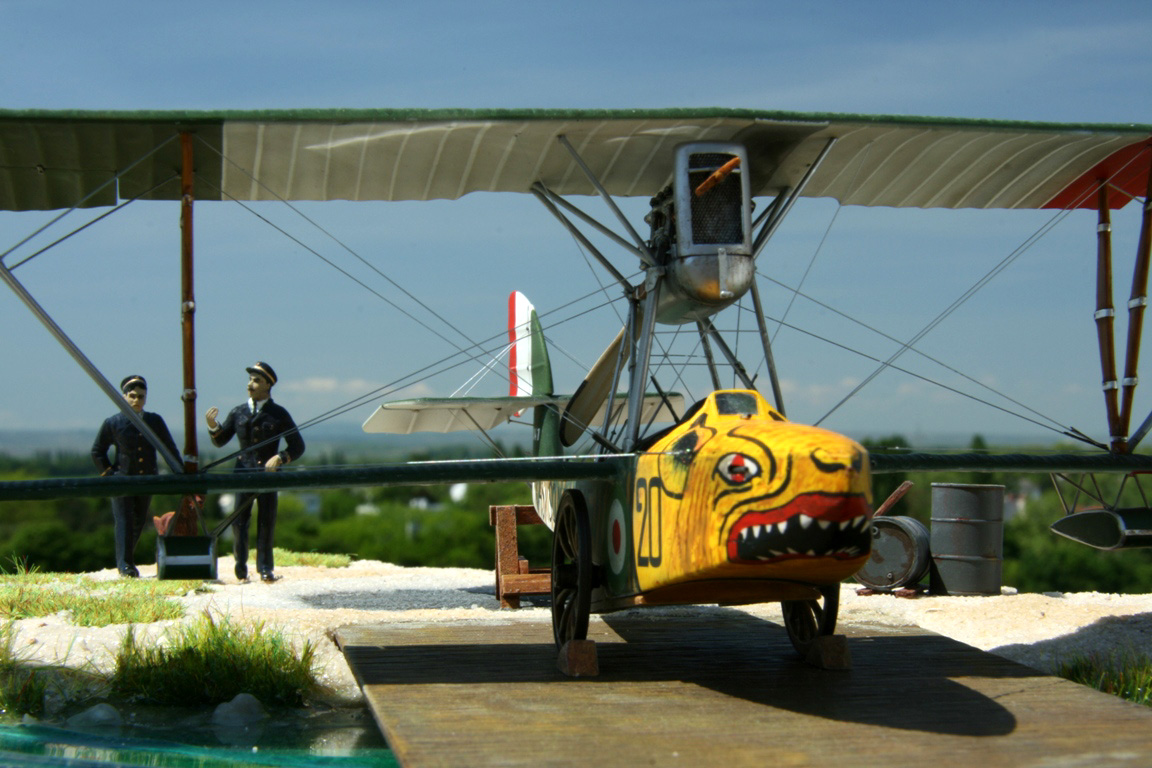
Dragon headThe most striking feature of the special scheme is the artistically painted dragon head. Since after fixing the wings, there would be little space to paint this artwork, I decided to address this at an early construction stage.The kit foresees for this purpose several curvy lines on the decal sheet. Therefore I first painted the bow of the hull yellow, and then tried to apply the decals. Notwithstanding the facts, that they didn’t want to comply to the shape of the part, in the end they looked far different from what could be seen on the well preserved original photographs. Since the original was apparently painted by some maestro, there was no other way, than to unroll the palette of the artist’s oils, and try to realize the head using a fine brush and hues from ochre to burnt umbra. 
 |
  |
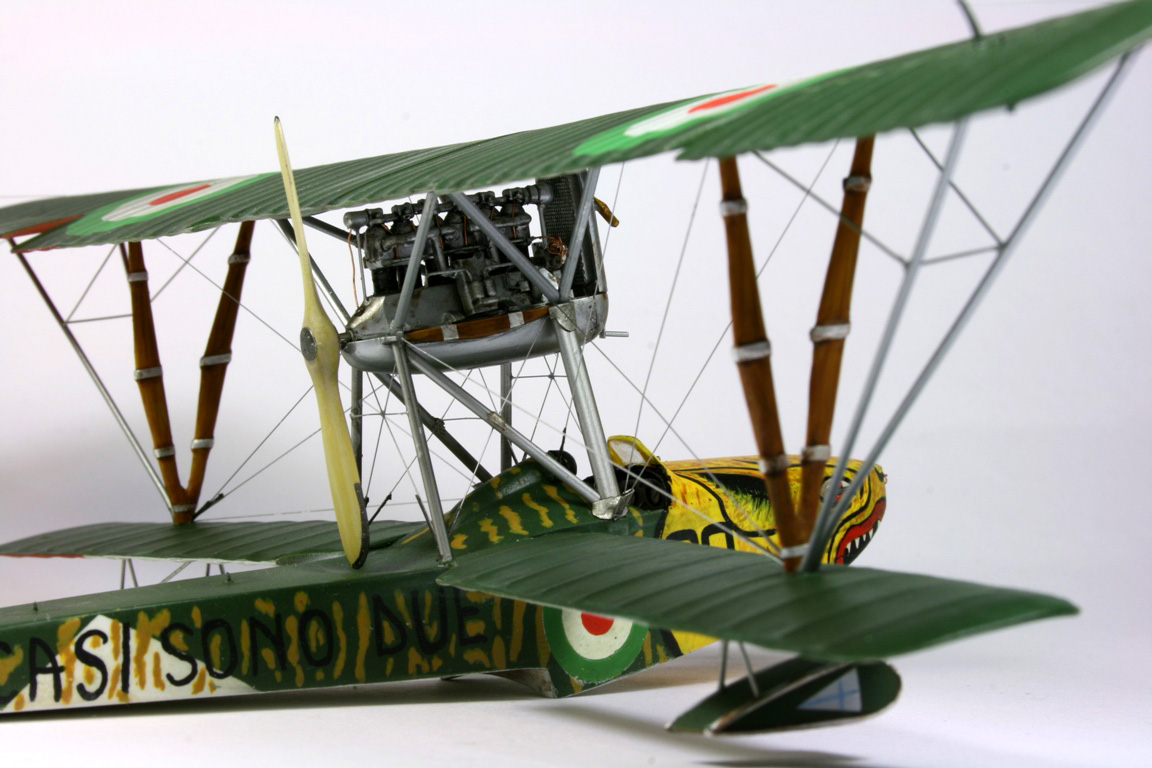
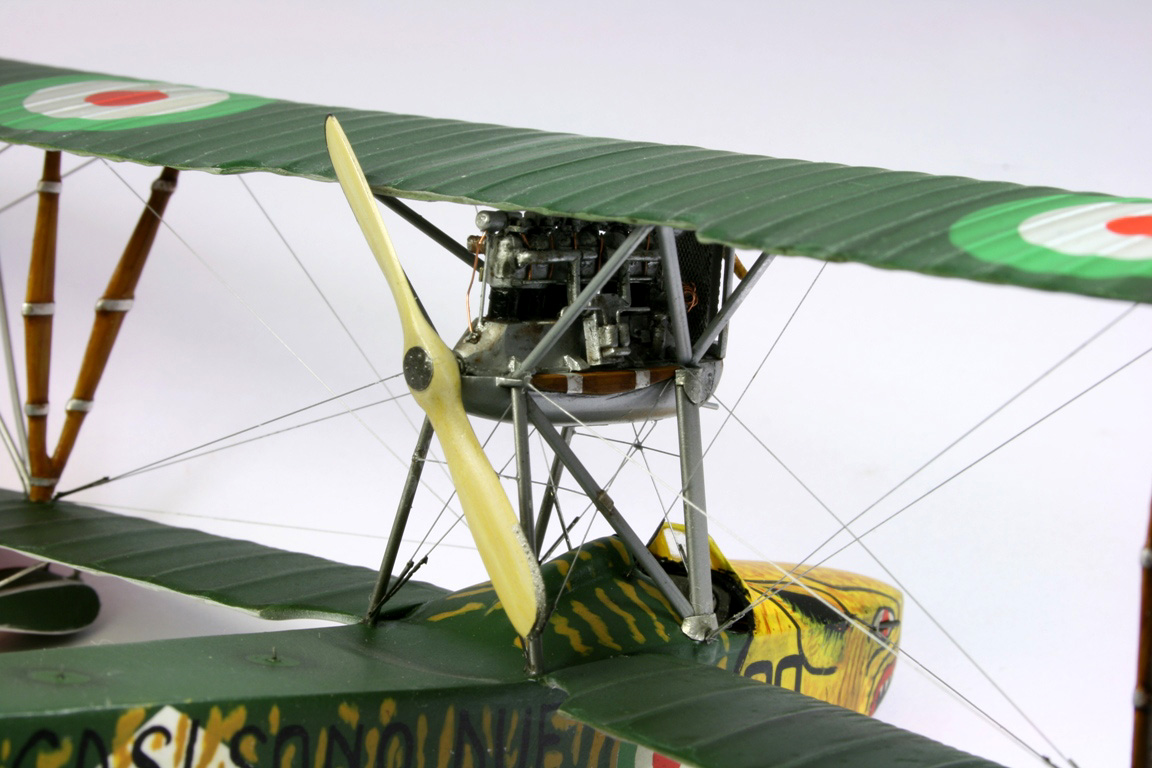
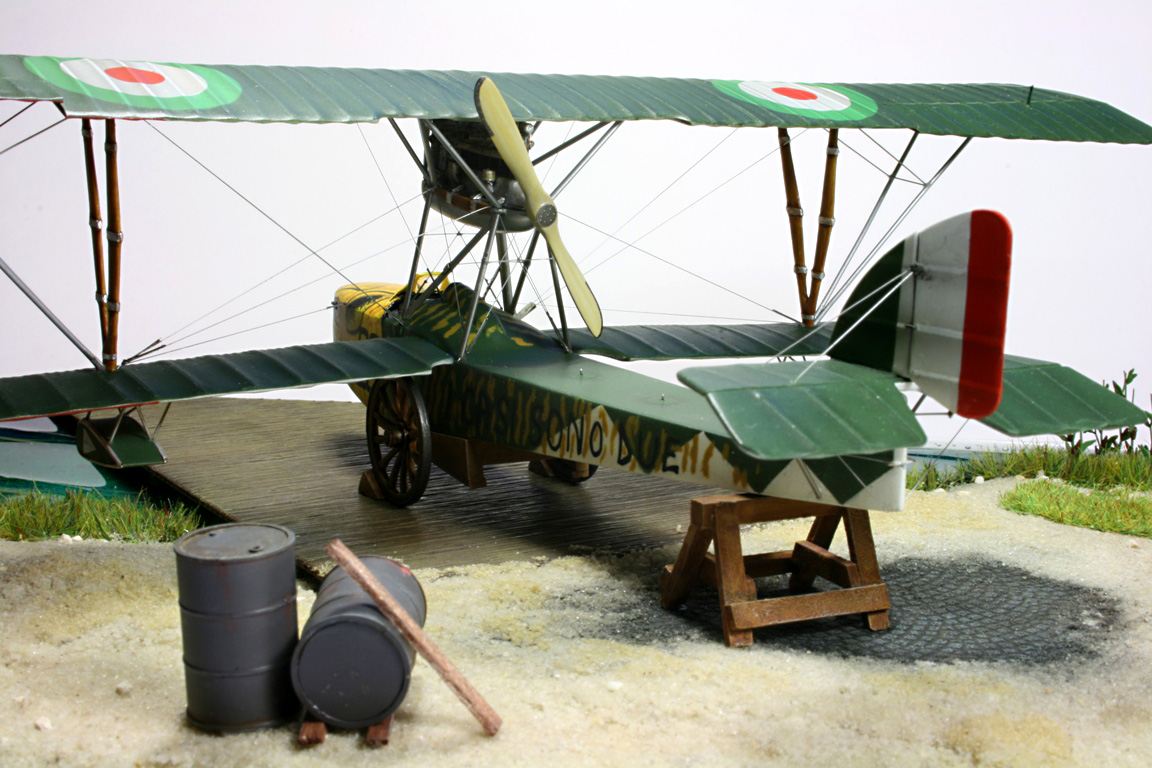
The writingAfter a thorough study of the pictures in the data file, the writing „i casi sono due“ (there are two possibilities) can be discerned. That’s a quote by an Italian Variete artist, Ettore Petrolini, who was rather famous at that time.The kit’s decal sheet offers the writing: „ICH_SON_AVE“. Upon my email request Mr. Valek of Fly just stated dryly that he’s aware of this, but there won’t be a correction sheet. As on the real plane the letters were drawn by hand, I used a thin black marker to create this writing on the fuselage sides. Re-building the engineThe attached engine is cast in one piece from resin. Since this part decisively influences tha appearance of the kit, extra care was needed in that matter.The engine in my kit had a parting line defect, which led to a skin between the cylinders, which could not be removed. For that reason, I cut the engine apart with a micro saw, and re-arranged the cylinders, exhaust s and other bits and pieces with parts from the PE leftovers. Painting was done with Alclad, weathering with artist’s oils and MiG pigments, which substituted for rust. The pusher propeller was too large, and would not permit rotation. I shortened it significantly, and re-shaped according to the Windsock images. |
 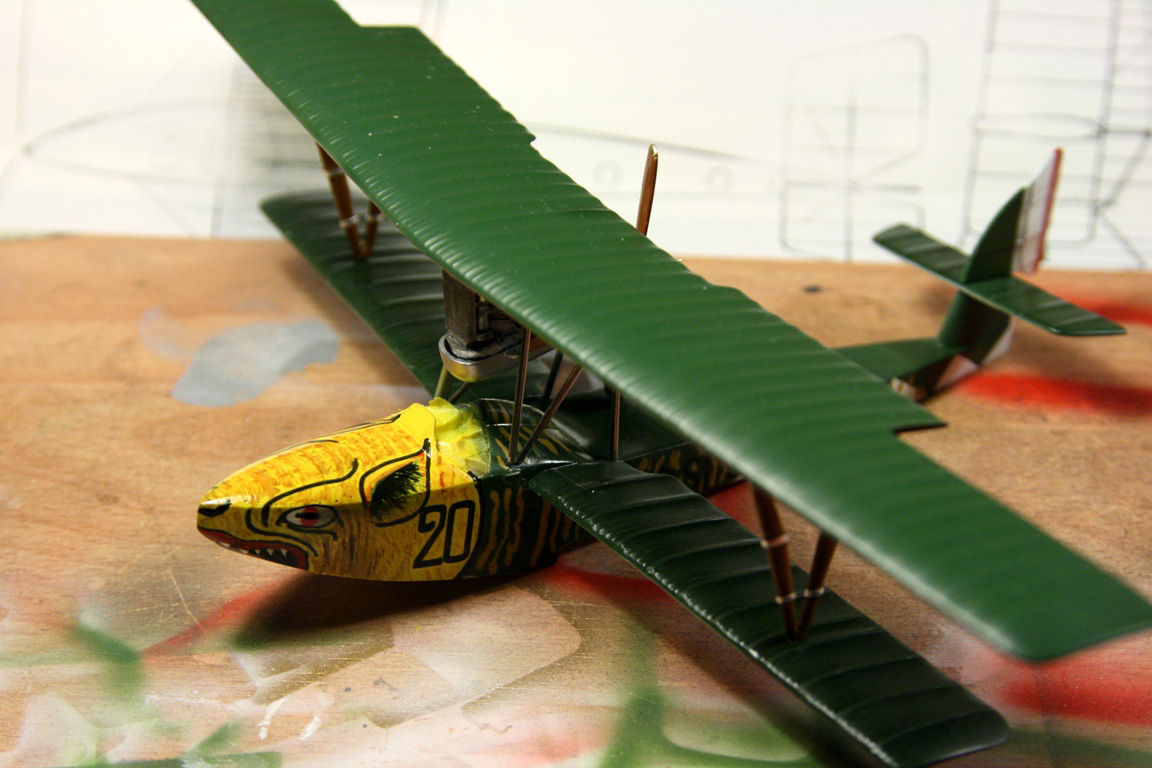 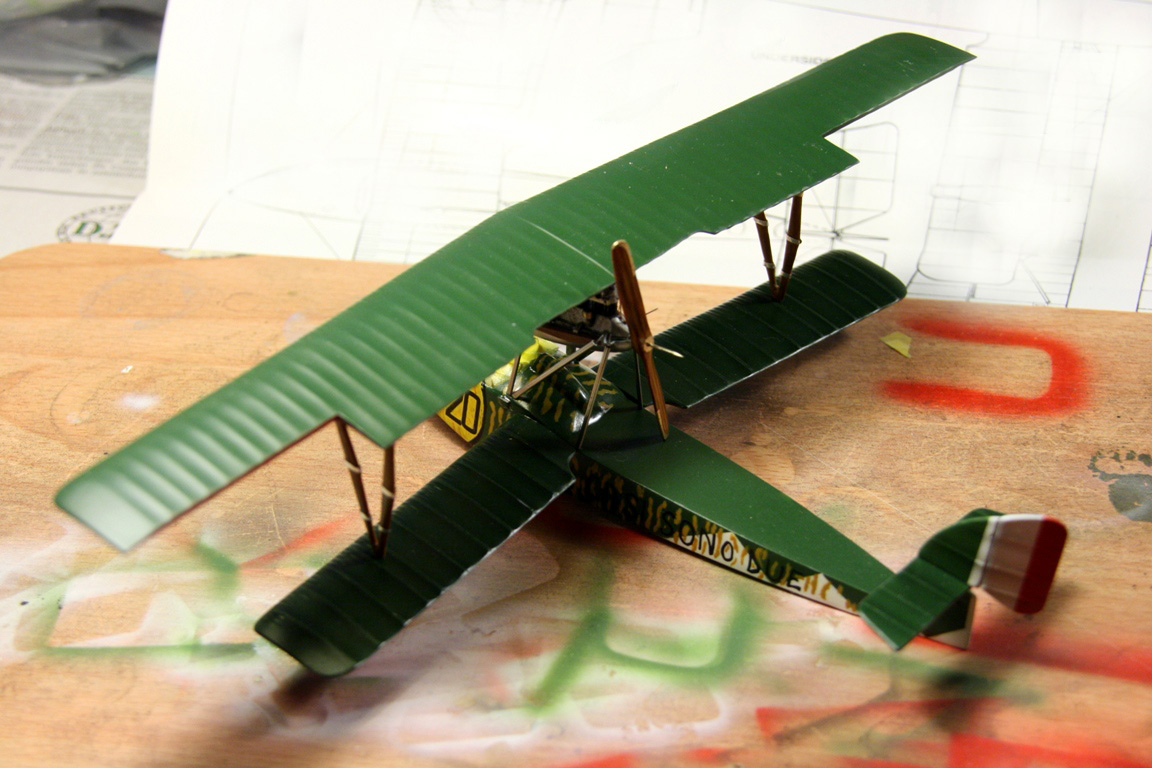 |
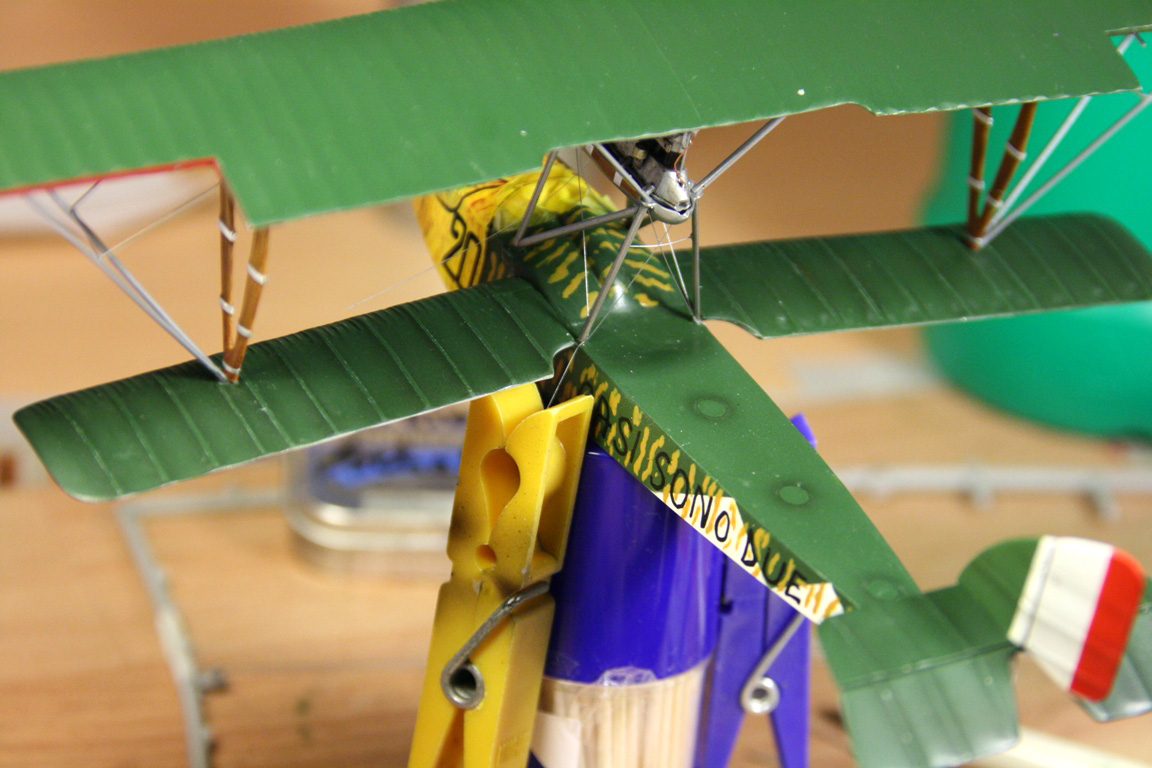
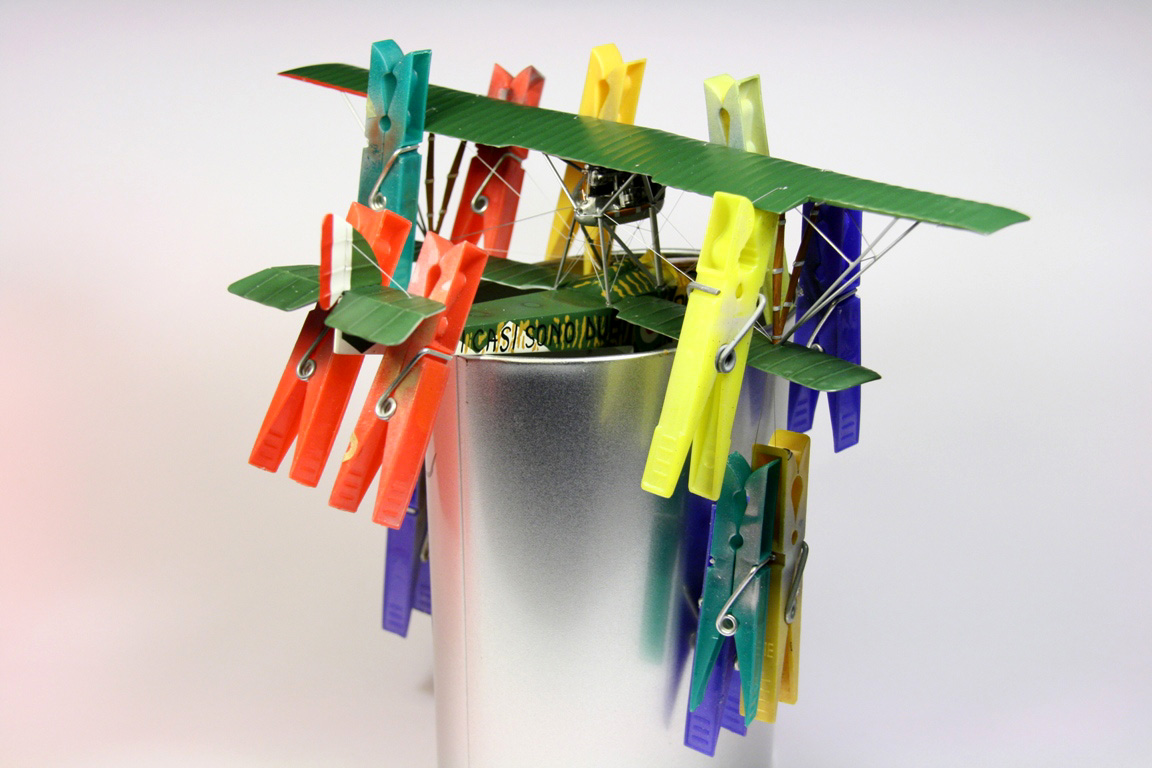
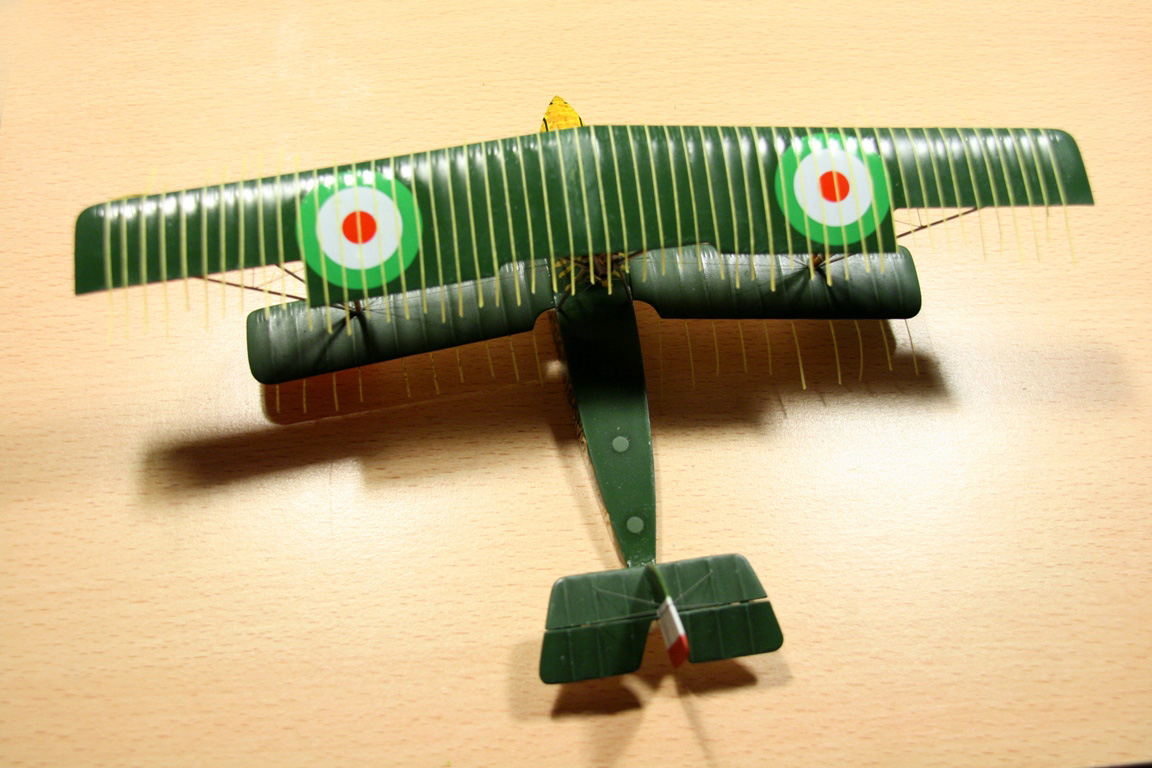
StrutsThe struts from the model offering are rather thin, what unfortunately makes them useless for applying the heavy upper wing. I used only the V-shaped struts, after elongating them somewhat, and fitting them with metal locating pins. The remaining struts are prepared from syringes, which were cut to length with a grinding disc, and then lightly squeezed in a vice, to feature the typical oval cross-section.This variant allows for an accurate, but flexible positioning of the subassemblies: the fuselage and the wings are first drilled, then equipped with metal pins from cut off wire pieces. Then the hollow syringes are located onto these pins. This assembly can by correctly aligned, and in the end fixed by drops of superglue. The connecting points were then partially covered by alu foil fairings. The whole setup is amazingly stable in the end. The rigging was realized with silver painted nylon string, which were first stretched on a frame for straightening and better spraying. The spots where the rigging cable would penetrate the wing were drilled through, the string pulled through these holes, and glued on one side. The other side was stretched over night by applying cloth pins to them and letting them hang over night. Next day the stings were glued on the other end, and the locating positions were sanded and sprayed over. |
  |
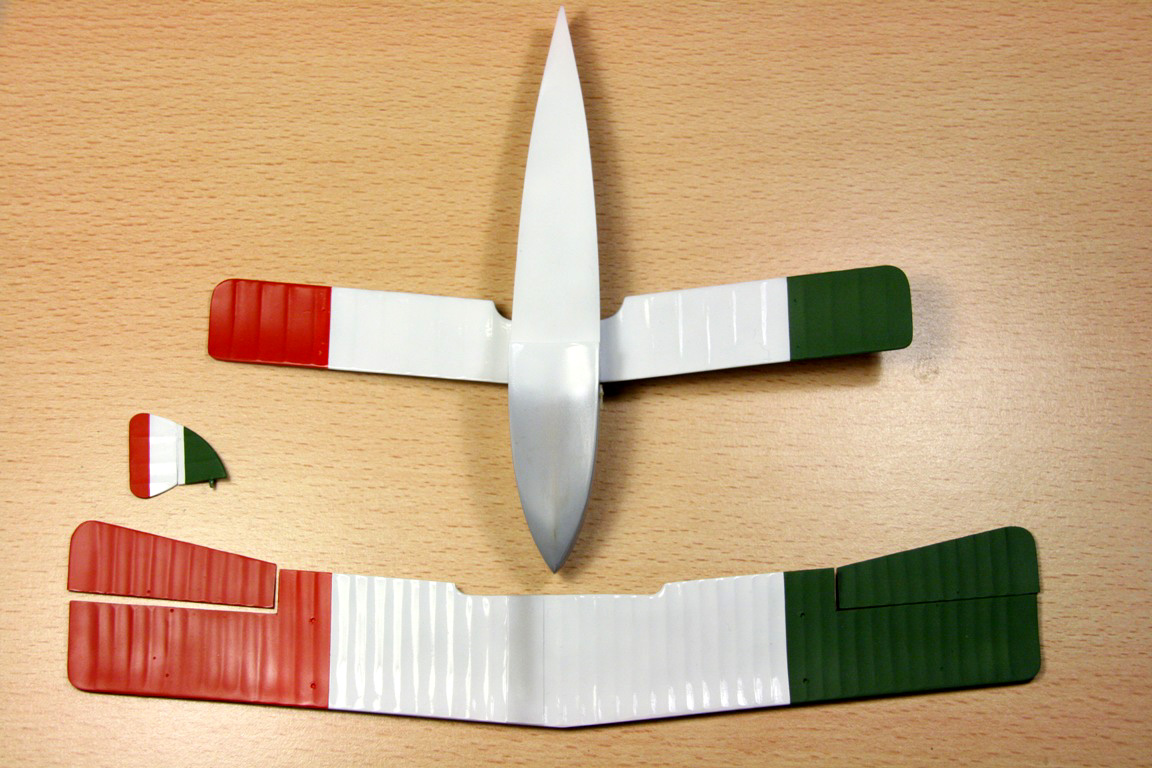
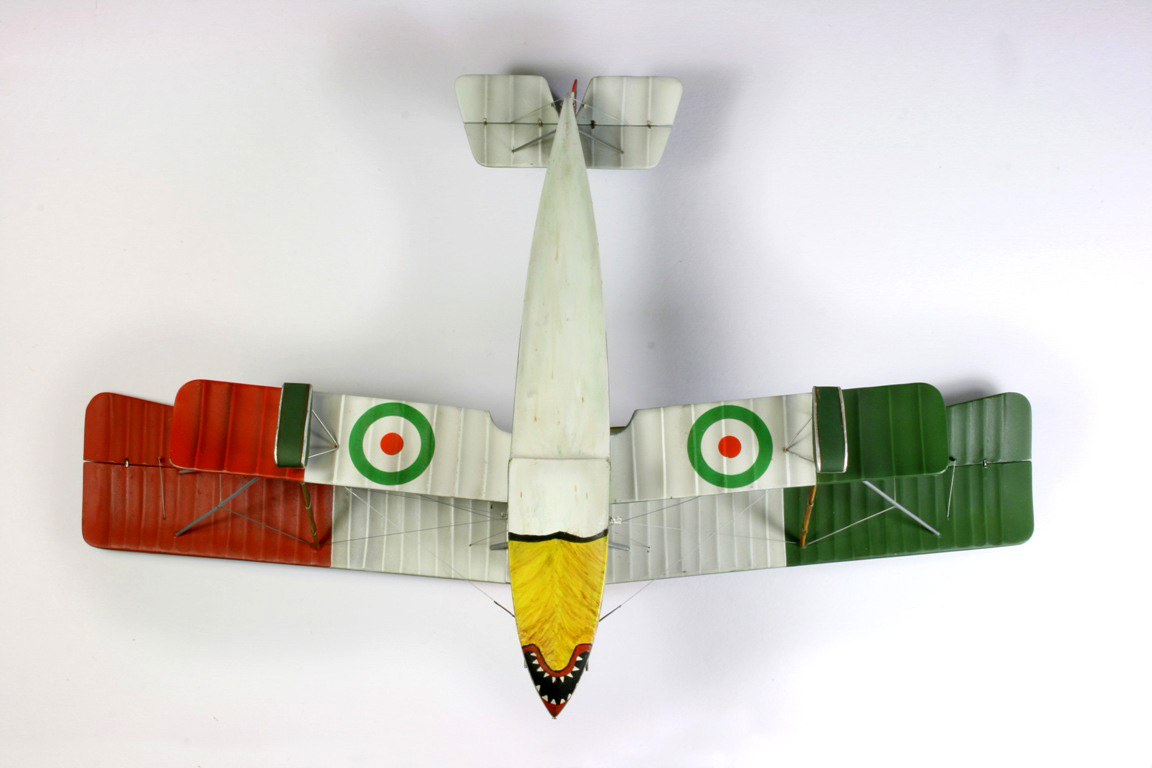
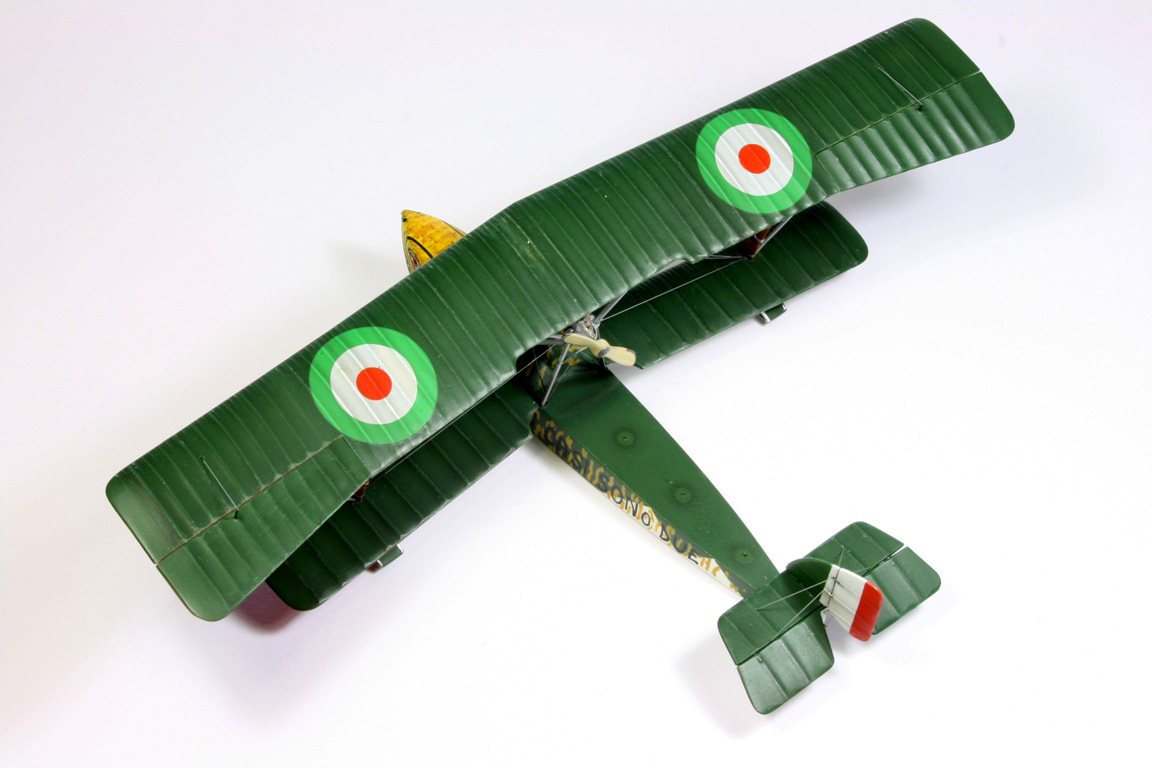
DecalsThe decals for the front fuselage Italian roundels were unfortunately much too large, so I sprayed them on. The roundels for the wings showed clear grid of the printing dots from the printer they were made on. Unfortunately I realized that first after the decals were already on. Since masking was hardly possible of the poorly attached decals (they cracked already at the initial application) I tried to blend in the grid as good as I could using a fine artist brush. Even the serial number is missing the first two numbers – the decals of this kit are really a great disappointment. |
 |
WeatheringSince the aircraft has hardly any panel lines, the classic black artist oil weathering gives little effect. I was striving for a particular plasticity of the large, and monolithic green upper wing surfaces. This was achieved using thin stripes of Tamiya tape located on top of the ribs, and then carefully sprayed with Tamiya smoke. Then there was a light dry-brushing with a lighter shade using oil paints, and a top seal by XtraColor flat. |
 |
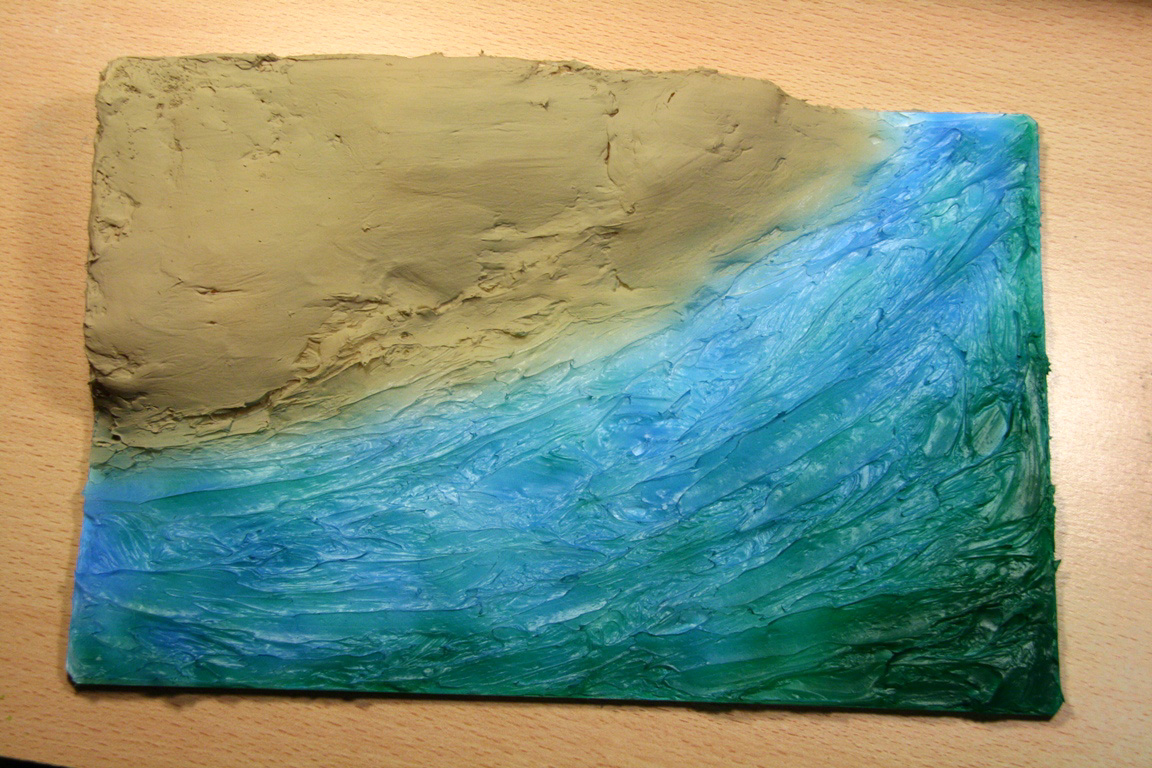
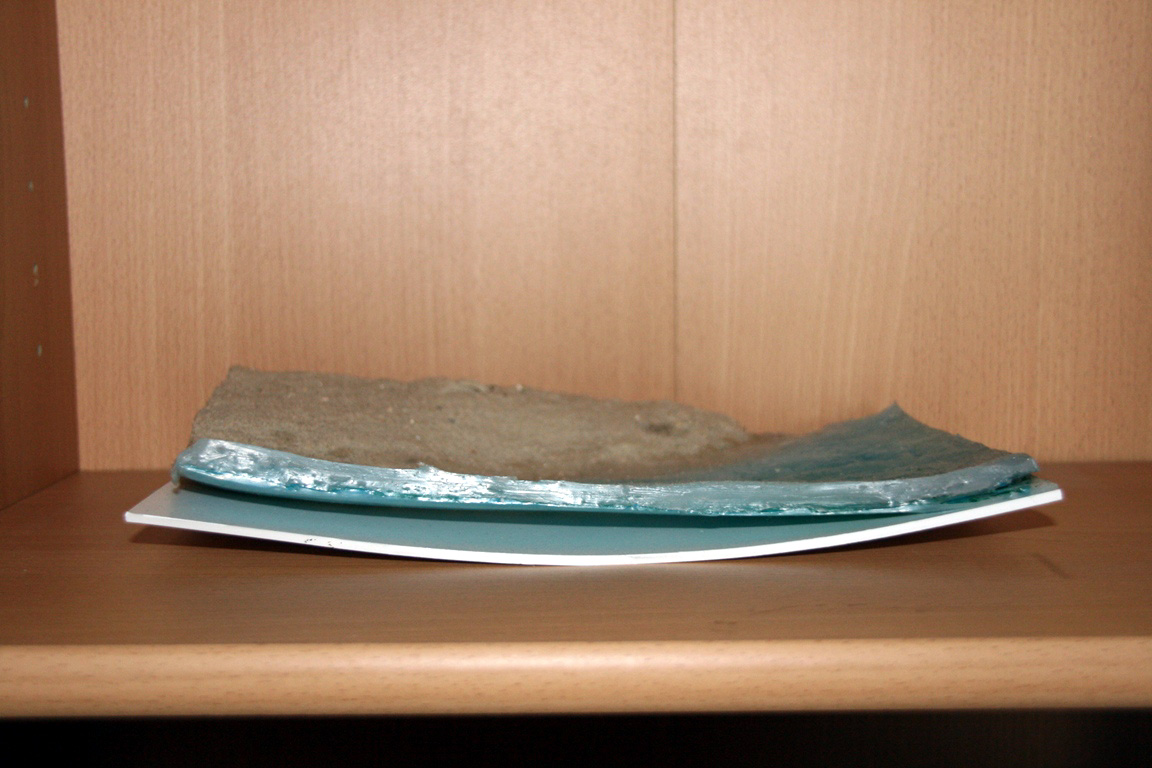
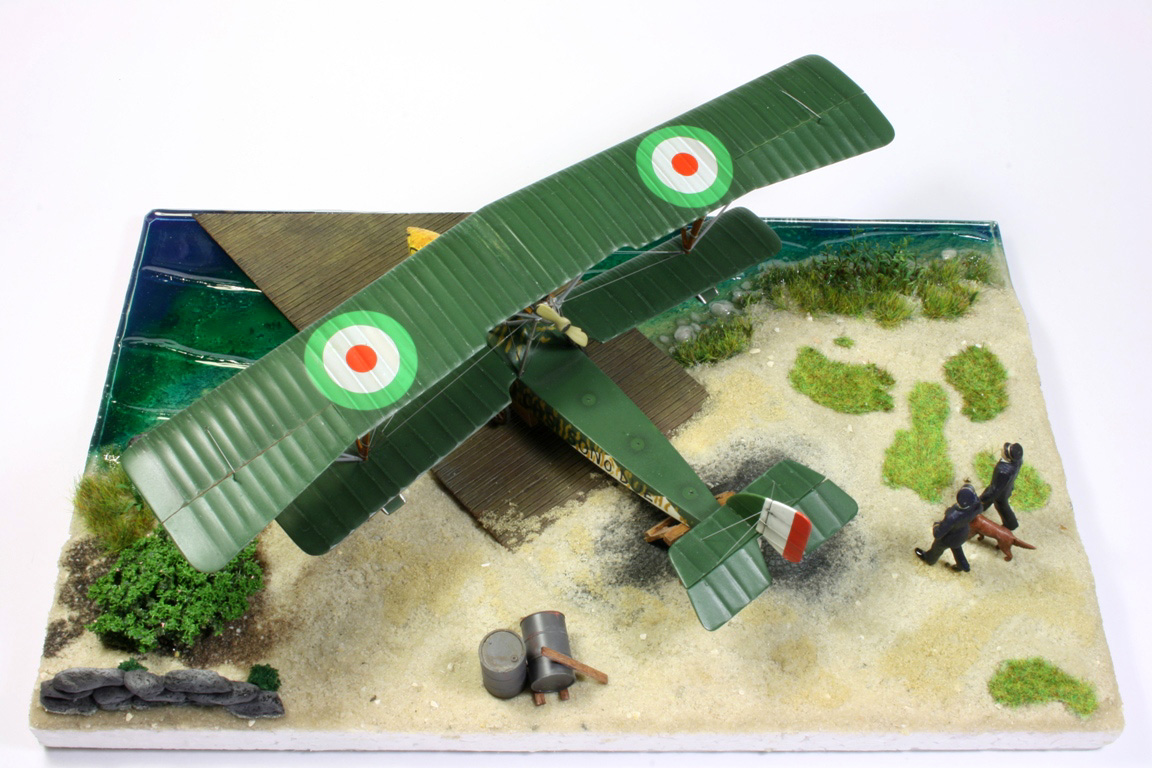
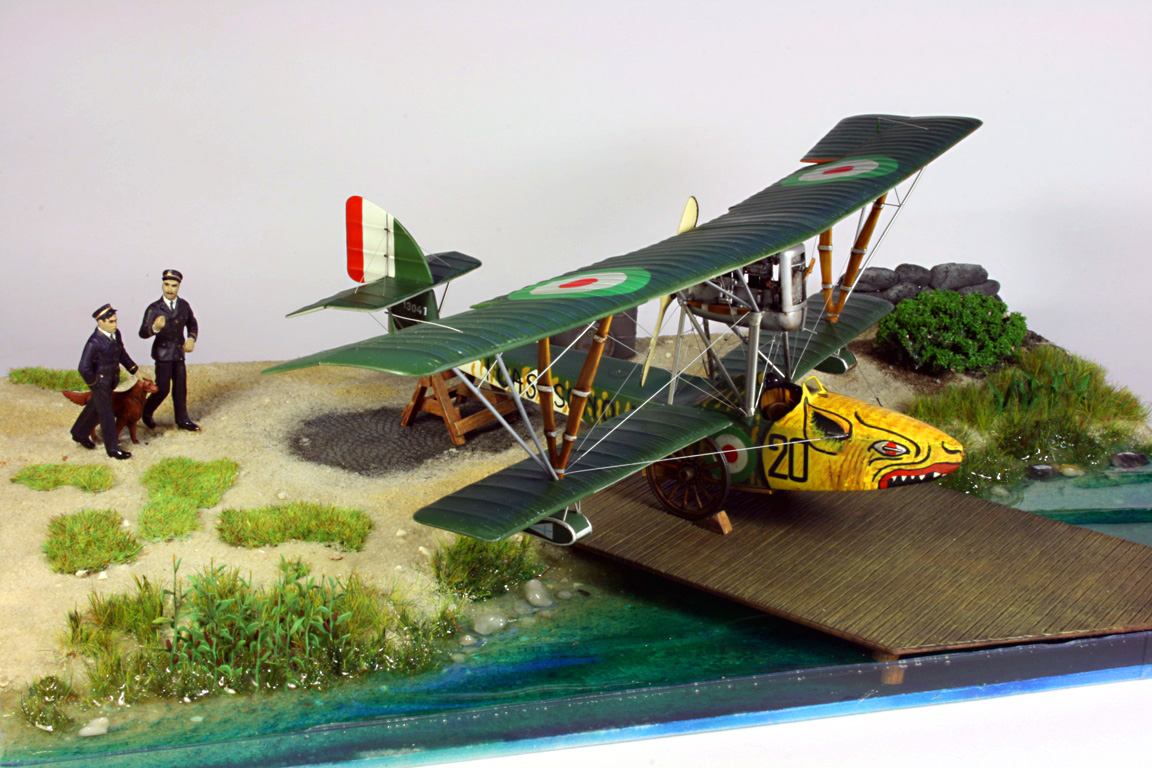
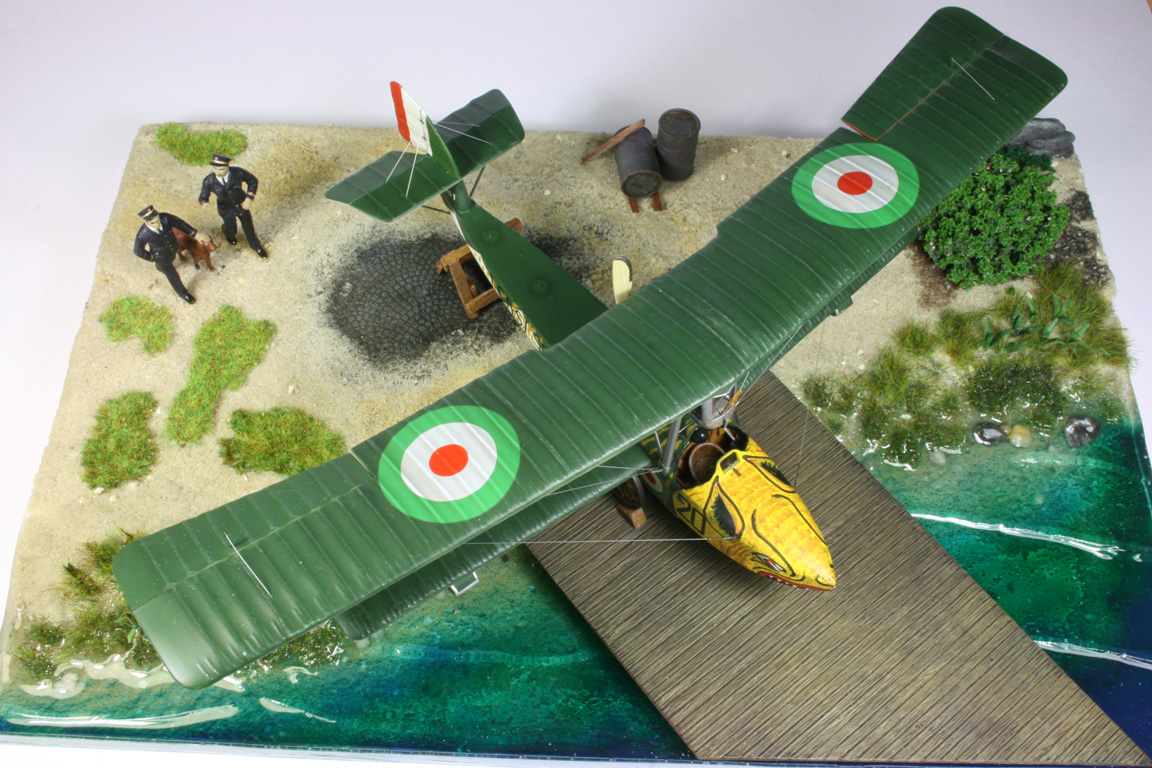
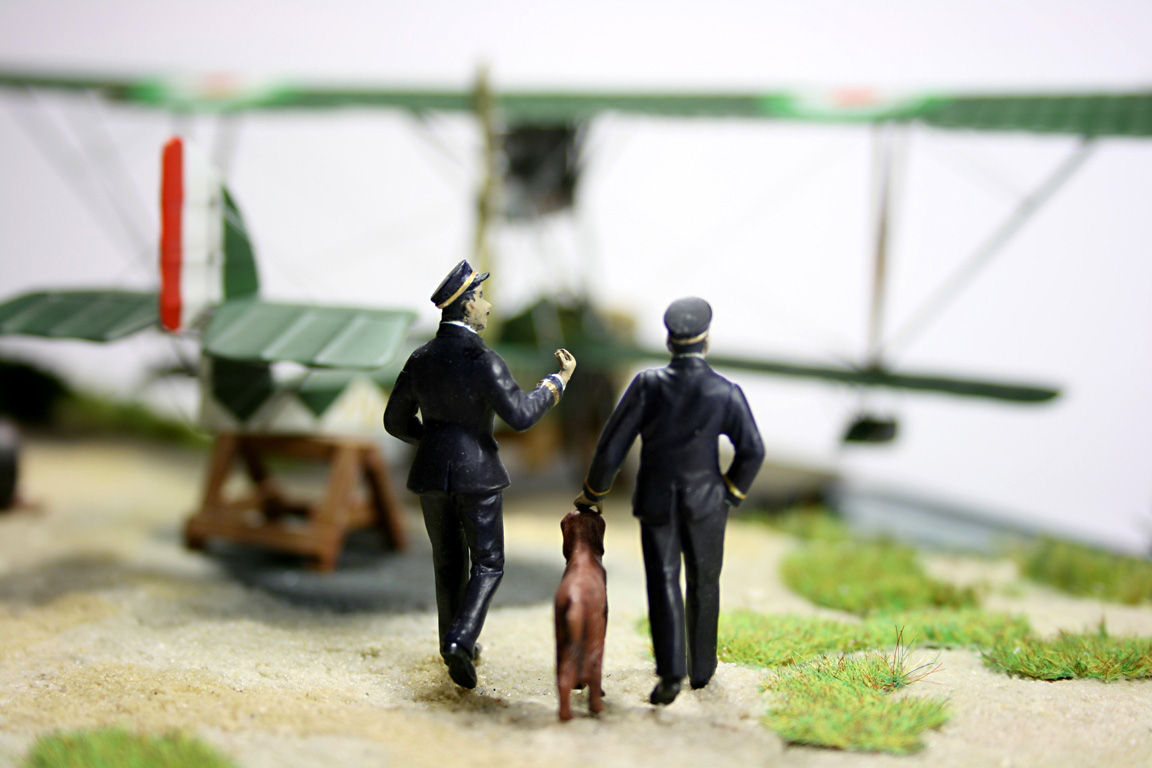
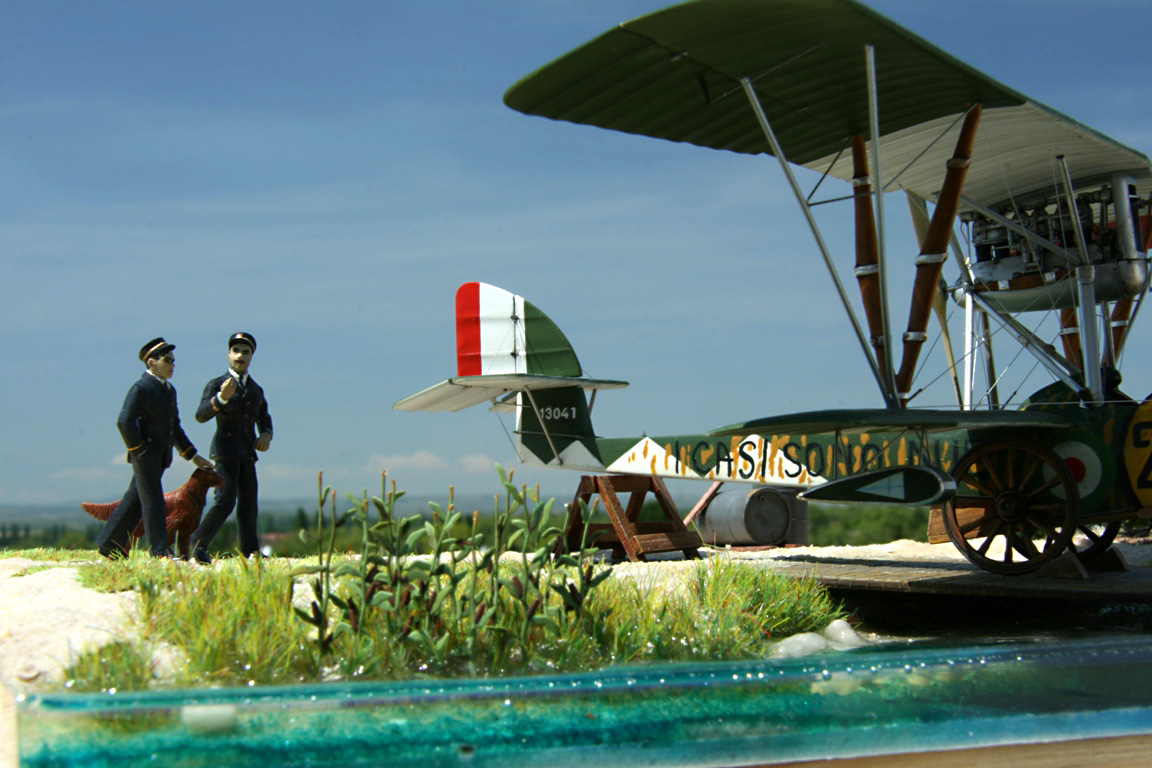
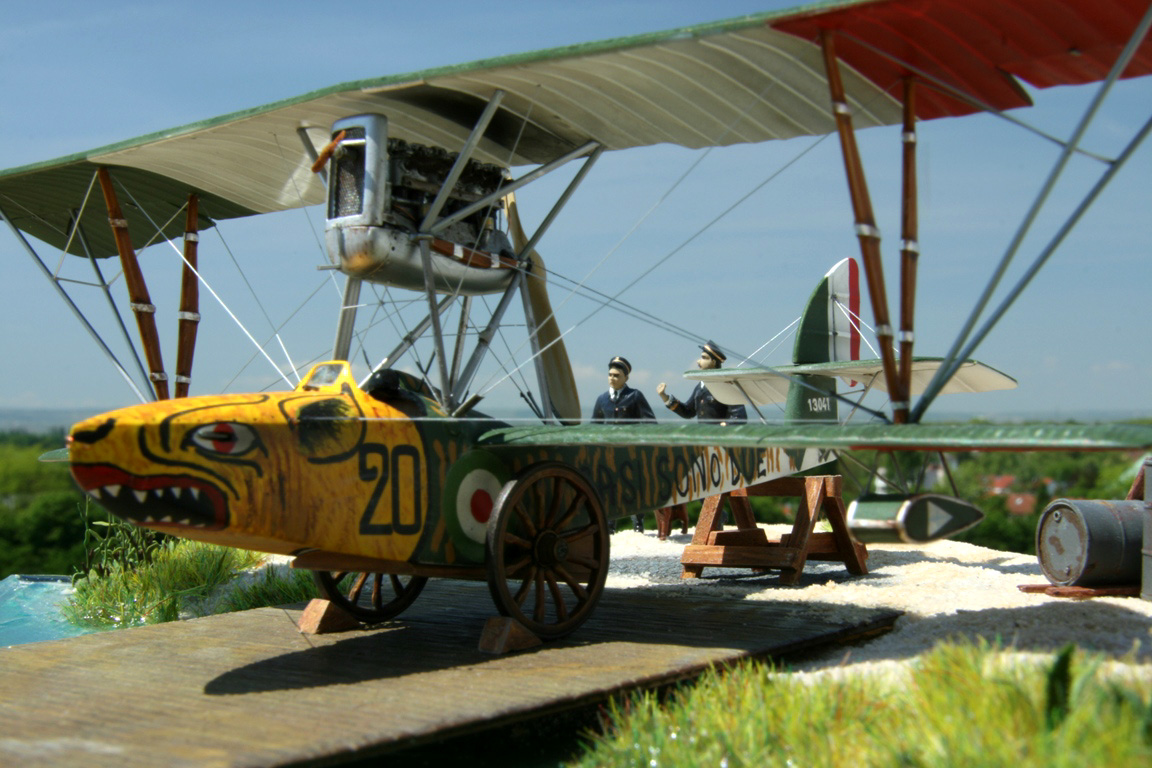
DioramaThe diorama gave me quite some headache. Initially, the Macchi should be beached, partially still lying in the water tried that first with a diorama based using silicone. This material unfortunately can’t be painted. And the surface is not very convincing either – something different had to be found…I decided to locate the Macchi on a jetty, as frequently seen on original pictures. The cart and the jack was prepared from bits of a plastic foam plate, the wheels came from a 1:72nd scale artillery from by Italeri. The water was cast from clear Epoxy resin. The surface turned marvelously smooth, but that’s not very realistic. So I’ve cast waves, and glued them on the smooth surface. The joint is practically invisible after pouring some more epoxy on top. The greenery came from a grass mat and a set for detailing bodies of water from the model railway supply. San was realized using bird sand and water-thinned white glue. On top came a bunch of details, and two figures mixed-and-matched from Preiser and ICM sets. These show two offices with a dog, gesticulating the Italian way – walking on the beach. 

|
   |
SummaryAll in all, the build of the model including the diorama took about one-and-a-half years. Again and again I was short of quitting the project and dumping it into the trash, when another major screw-up appeared. To calm down, and not lose interest completely, I built some other, simpler models in between. In the end, I was happy to have finalized – against all odds and in spite of a very disappointing kit - a model of this very interesting and rare airplane.The diorama won a silver medal on German Model Masters in Nürnberg in 2010, and an article was featured in the August issue of the German Modell-Fan magazine. | |
 |
 |
 |
 |
 |
 |
 |
 |
 |
|
All photographs (c) J.Kierat